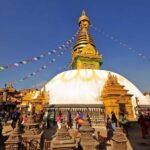
REVIEW · ANNAPURNA CIRCUIT TREKS
Annapurna Circuit with Tilicho Lake Trek
Book on Viator →Operated by Nepal Social Treks and Expedition · Bookable on Viator
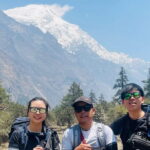
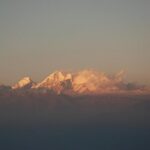
Tilicho adds drama to an already epic circuit. This trek is built for active travelers who want the real Annapurna Range—deep valleys, high passes, and big mountain days—with a guide handling the day-to-day decisions. Two things I like a lot are the small group size (max. 8) and the certified guide support, which keeps you on route without the stress of navigating alone. One consideration: this is challenging high-altitude trekking, so you’ll want to be honest about your fitness before committing.
You also get a practical mix of travel styles. The trip includes a Jomsom–Pokhara flight plus overland transport, so you’re not stuck doing every single kilometer on foot. And once you’re hiking, the plan includes a key altitude adjustment day in Manang plus a high-altitude detour to Tilichol Lake—meaning your body and your schedule both get some thought.
Finally, the price may look “not cheap” at first glance, but a lot of big costs are actually bundled. Still, you’ll need to budget for drinks/alcohol during the trek, your Nepal entry visa, and any travel/medical insurance since those are not included.
In This Review
- Key highlights that make this trek worth your attention
- What you’re really signing up for on the Annapurna Circuit
- Price and value: why $1,093.34 can make sense
- Logistics that matter: flights, cars, and keeping the pace realistic
- Altitude planning you can actually use (Manang rest + Tilichol timing)
- Day-by-day trek: what each stop feels like and what to watch for
- Day 1: Kathmandu → Besisahar (drive day)
- Day 2: Trek toward Pisang (forest valley + two crossings)
- Day 3: Ascend toward Manang (stunning ridge views, Tilicho Peak in sight)
- Day 4: Manang rest and village time (your acclimatization pause)
- Day 5: Khangsar (Tibetan-style village feel)
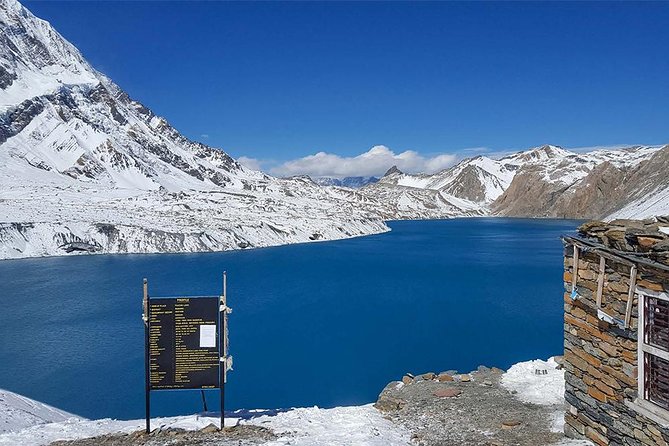
- Day 6: Up toward Tilichol Lake (gompa + ridge trail options)
- Day 7: Base Camp → Tilichol Lake (start early for wind)
- Day 8: Tilichol area → Yak Kharka direction (climb out of the lake zone)
- Day 9: Toward Thorong Phedi (ridge walk, Kone River bridge)
- Day 10: Thorong La Pass → Muktinath (big altitude + snow risk)
- Day 11: Jomsom (Kali Gandaki River valley walk)
- Day 12: Jomsom → Pokhara (morning flight + then on to Kathmandu)
- Day 13: Pokhara → Kathmandu (7-hour coach/drive and overnight)
- Guides, safety, and the small-group advantage (and what support really buys)
- Teahouses, meals, and how to plan your daily energy
- What to pack (so the trek feels hard in the good way)
- Who this trek suits best (and who should think twice)
- Should you book this Annapurna Circuit + Tilicho Lake detour?
- FAQ
- What time does the tour start?
- Is airport pickup and drop-off included?
- How many people are in the group?
- Does the price include the Jomsom–Pokhara flight?
- Are permits included?
- What meals are included during the trek?
- Is accommodation in Kathmandu included?
- Are porters provided?
- Is travel or medical insurance included?
- Is the international flight ticket included?
Key highlights that make this trek worth your attention
- Tilicho Lake detour adds a high-altitude payoff beyond the usual circuit feel
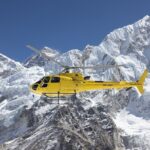
- Jomsom–Pokhara flight saves time and energy after days in the mountains
- Small group (up to 8) makes the experience feel focused and easier to manage
- Permits included via Annapurna Conservation Area Permit and TIMS
- Porter support (1 for 2 travelers) helps you hike farther without overloading
- Early-morning Tilichol strategy is built in to avoid the later-day winds
What you’re really signing up for on the Annapurna Circuit
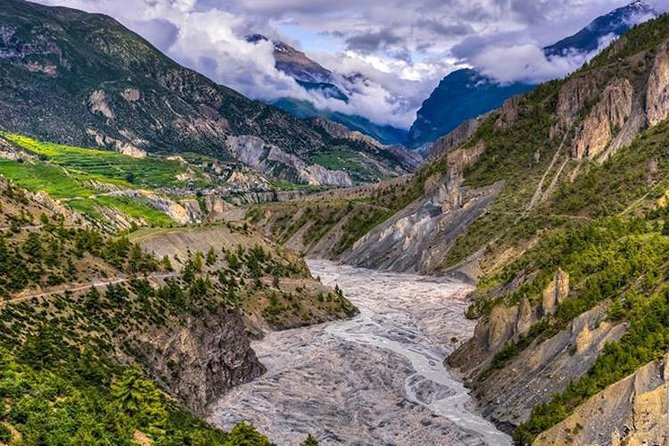
This is an Annapurna Circuit experience with a Tilicho Lake-style detour (the trip description references a high-altitude Tilicho Lake itinerary, while the day-by-day schedule provided runs through 13 days). Either way, the intention is clear: you’re not doing a casual trek. You’re doing a route that mixes steep sections, long hiking days, and real elevation.
What makes it especially appealing is the “guided but flexible” approach. Your guide handles daily planning, so you’re not spending your energy on route-finding. The trekking is also set up so you can focus on two things: views and effort. On days like the approach to Thorong La and the move toward Muktinath, you’ll feel every climb in your legs. That’s part of the deal—but it’s also why it’s so satisfying when you arrive.
You can also read our reviews of more hiking tours in Kathmandu

Price and value: why $1,093.34 can make sense
Let’s talk value in the concrete way trekkers care about: what costs would hit you even if you booked everything yourself.
At $1,093.34 per person, this package includes:
- accommodation in teahouse/guesthouse during the trek
- a certified professional guide
- trekking permits (Annapurna Conservation Area Permit + TIMS)
- meals (breakfast daily, plus lunch and dinner for the specified trek days)
- a Jomsom–Pokhara flight
- private vehicle transport as outlined
- airport pickup/drop-off as mentioned
- porters (1 porter for 2 travelers) to carry personal gear and group equipment
- a first aid kit and required trek gear usage (sleeping bag, duffel bag, etc.)
What that means for you: you’re paying for the parts that are hardest to DIY—permits, logistics, and getting from one “end” of the trek to the other efficiently. The tradeoff is that it’s less “budget backpacker” and more “supported trek.” If you want to travel lighter and smoother, that bundled cost is doing real work.
What’s not included is also important:
- drinks/alcohol
- accommodation in Kathmandu
- international flights
- Nepal entry visa fees (paid directly by you)
- travel and medical insurance (not included)
If you already have travel insurance and you’re okay paying for drinks, the package still tends to be good value—because the expensive, time-consuming logistics are covered.
Logistics that matter: flights, cars, and keeping the pace realistic
The itinerary blends hiking with transportation in a way that makes the overall plan feel workable.
You start with a long road day from Kathmandu to Besisahar (via the Kathmandu–Pokhara highway route). Then you move onto the trail. Later, you reach Jomsom and fly to Pokhara. That flight is a big deal. It helps you avoid extending your trek time unnecessarily, and it gives you a clean transition back to comfort before the drive to Kathmandu.
The schedule also has built-in rhythm:
- early starts on key hiking days (especially around Tilichol)
- a rest/adjustment day in Manang
- big elevation work spread across multiple days rather than one single punishment day
One small practical note: the day-by-day description includes approximate hike durations (for example, several days around 4–9 hours). Your actual time will vary based on pace and altitude, but the structure is there.
Altitude planning you can actually use (Manang rest + Tilichol timing)
Altitude is where many treks go wrong—not because the route is impossible, but because people underestimate how their bodies respond.
This trip addresses that in two ways based on what’s written in the plan:
- Manang rest day for acclimatization. You spend a dedicated day in Manang to adjust before going higher. That’s not wasted time; it’s often the difference between feeling strong on later passes versus feeling wrecked.
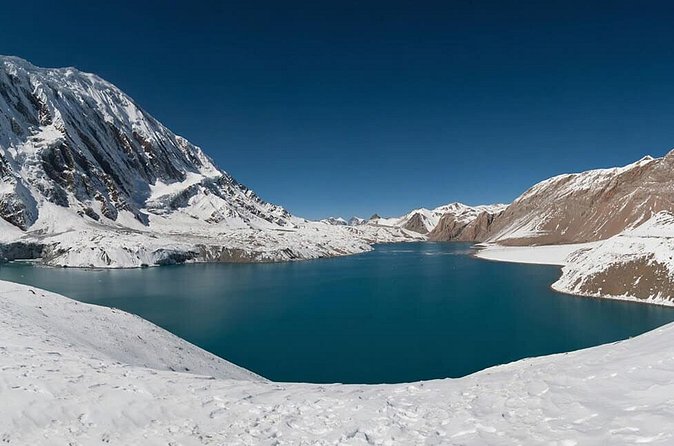
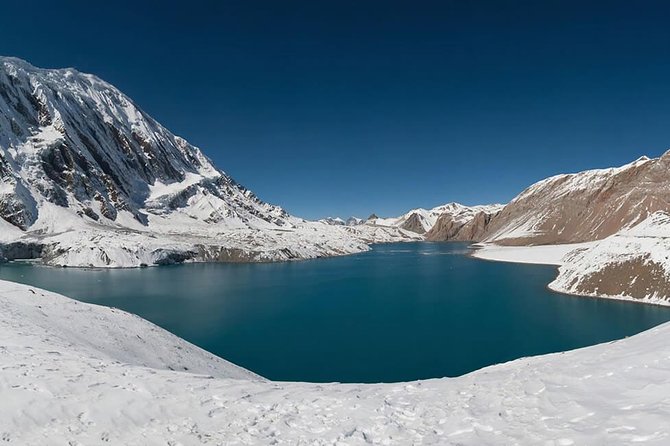
- Tilichol Lake timing to avoid winds. The plan specifically points out that starting early helps you avoid the stronger winds that tend to pick up later due to temperature mixing. You’ll feel those wind-and-cold conditions more than you expect at higher elevations, even on days that seem clear.
If you take one practical lesson from this: treat the early starts seriously. They’re there to protect your comfort and make the day’s hiking more enjoyable.
Day-by-day trek: what each stop feels like and what to watch for

Below is what you can expect from each day segment, and where the tradeoffs usually show up.


Day 1: Kathmandu → Besisahar (drive day)
You’ll travel from Kathmandu to Besisahar via the Kathmandu–Pokhara highway route, then continue along a paved road that follows the Marsayangdi River area. This is a long transfer day (listed around 9 hours), so don’t plan on doing anything strenuous beyond getting ready for the next day.
Why it’s useful: it positions you for a proper start on the Annapurna side rather than forcing a rushed first hike.
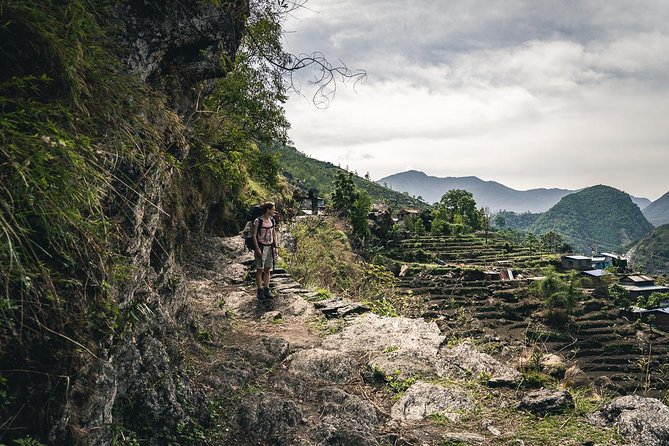
Day 2: Trek toward Pisang (forest valley + two crossings)
You continue through deep forest in a narrow, steep valley. The route includes two bridge crossings at about 2,910 meters and 3,040 meters.
This is a classic “getting your legs back” day: not the hardest altitude work yet, but enough climbing and uneven ground to wake your body up.
Possible drawback: narrow valleys can feel close and repetitive—expect the walking to feel a bit slower even if the time looks moderate.
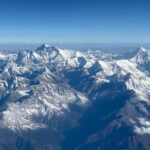
Day 3: Ascend toward Manang (stunning ridge views, Tilicho Peak in sight)
You start your ascent on a steep ridge with strong vistas over Manang Valley and Tilicho Peak (listed at 7,134 meters). Then you descend through Humde, including Manang’s airstrip area around 3,280 meters.
This day is all about view-reward and effort-management. Ridge climbing can feel short but steep. If you rush, you’ll pay later at higher elevations.
Day 4: Manang rest and village time (your acclimatization pause)
Today is a rest day to adjust to higher altitude. The plan also notes Manang is sizable for the region and gives you time to explore and interact with locals.
Take this day seriously. Go slow. Keep your hydration up. Even if you feel okay, this is the time to let your body catch up.
Day 5: Khangsar (Tibetan-style village feel)
You follow the path leading toward the river, cross Khangsar Khola via a bridge, then ascend to Khangsar Village. The village is described as typical Tibetan in character.
This is a nice “change of scenery” day: less about skyline peaks and more about the feel of settlement life along the route.
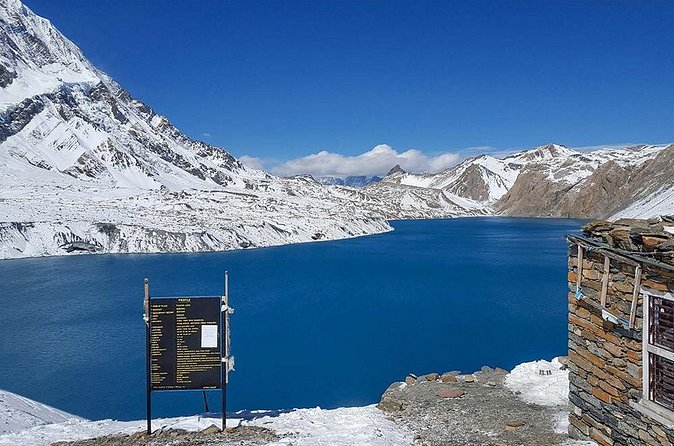
Day 6: Up toward Tilichol Lake (gompa + ridge trail options)
You’ll come across a gompa and follow a trail up toward a high ridge. The plan mentions two routes: an older, more challenging option and a newer, easier option. You’ll reach Tilichol Lake area by trekking through that higher terrain.
What to expect: the elevation will tighten your breathing, and the effort will feel steady rather than explosive. Good to remember if you’re tempted to “power up” the first steep parts.
Day 7: Base Camp → Tilichol Lake (start early for wind)
The plan again stresses starting early to avoid stronger winds later in the day. You’ll cover the journey from Base Camp to Tilicho (the schedule describes Tilicho Base Camp to the lake area).
This is the day where comfort matters. When wind picks up, the cold can turn your pace into survival mode. Following the early-start logic makes a noticeable difference.
Day 8: Tilichol area → Yak Kharka direction (climb out of the lake zone)
To reach Yak Kharka, you descend from Tilicho Base Camp and climb about 500 meters as you pass through Tengi. The plan notes you’ll leave the Marsayangdi Valley and head toward the Thorung area.
Tradeoff: after a high-altitude lake segment, climbing toward the next section can feel mentally tiring even when the numbers aren’t huge.
Day 9: Toward Thorong Phedi (ridge walk, Kone River bridge)
You start with breakfast, then ascend toward a ridge before gradually descending toward the Kone River. You cross via a wooden bridge and continue on a narrow path.
This is often a “focus day.” Don’t spend it chasing speed. Let your legs settle, and keep your breathing steady.
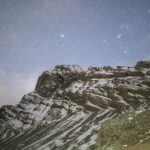
Day 10: Thorong La Pass → Muktinath (big altitude + snow risk)
Today is described as a long trek to reach Muktinath, beginning early. You’ll travel toward Thorung La Pass, with notes that high altitude and extreme snow can pose challenges.
This is the day where conditions matter most. Even in good weather, you should expect cold and fatigue. Move carefully on uneven ground, and listen to your guide’s pacing advice.
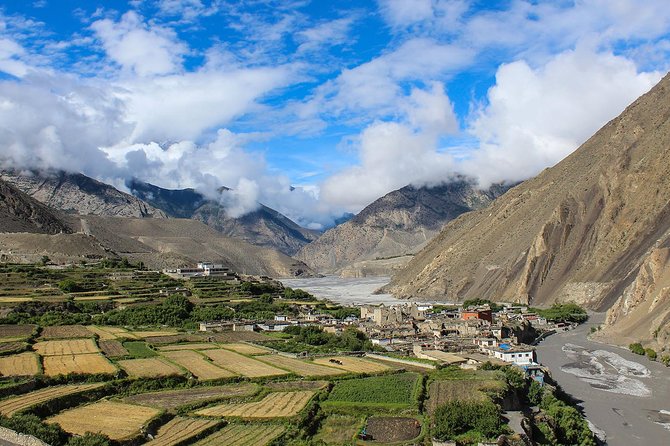
Day 11: Jomsom (Kali Gandaki River valley walk)
You can follow trails of Kagbeni or Lupra toward Jomsom. The route goes along the banks of the Kali Gandaki River. Jomsom is described as a chilly valley with amenities.
This day is a payoff day: after hard altitude work, you’re walking through a more settled region with the feeling of civilization returning.
Day 12: Jomsom → Pokhara (morning flight + then on to Kathmandu)
You wake up early to catch a morning flight to Pokhara. The plan says you’ll get breathtaking mountain views during the flight. Then you’re escorted to your next transport and continue toward Kathmandu.
Day 13: Pokhara → Kathmandu (7-hour coach/drive and overnight)
After breakfast, the trip from Pokhara to Kathmandu begins with a tourist coach, taking about 7 hours. Overnight is arranged in Kathmandu in the agreed category with BB plan.
This is where you finally get to treat yourself a little—shower, stretch, and a slow evening. You’ve earned it.
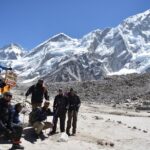
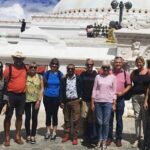
Guides, safety, and the small-group advantage (and what support really buys)
This trek is designed around a certified professional guide. The marketing line is about trekking safely without the risk of getting lost, but what that means in real life is simpler: you spend less time second-guessing and more time moving well.
The experience is also limited to a maximum of 8 travelers, which matters on a route like this. Smaller groups tend to:
- reduce waiting at crossings and narrow sections
- make pacing easier to manage
- keep logistics smoother when weather shifts
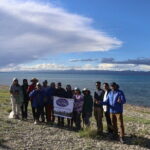
There’s also a strong human support element in how the operator is described through a recent client note praising the professionalism and kindness of the guide team, including NC Sherpa and porter MisterD Sherpa. That kind of consistency is what you want when the mountains get serious.
Teahouses, meals, and how to plan your daily energy
Accommodation during the trek is in teahouse/guesthouse settings. Meals are included in the schedule (breakfast daily, plus specified lunches and dinners). That removes one of the biggest trekking headaches: figuring out where to eat and what to order every day.
Still, you’ll pay attention to what’s practical:
- drinks aren’t included, so bring a water strategy (and expect that bottled water may cost extra)
- alcohol is available to purchase, but treat it like a treat, not a plan
- pack for cold evenings: even when days feel manageable, nights at altitude can bite
Because porters carry gear with a ratio of 1 porter for 2 travelers, you’ll likely hike with less weight than you would on an unguided trek. That’s not about being lazy. It’s about keeping your energy for the pass day.
What to pack (so the trek feels hard in the good way)
The tour includes use of a sleeping bag and duffel bag, plus a first aid kit is available. But you’ll still want to bring your own basics.
For this style of high-pass trek, I’d prioritize:
- layered clothing for cold mornings and wind chill
- gloves and a hat (wind is explicitly mentioned on Tilichol timing)
- good traction hiking shoes/boots
- a daypack for water/snacks
- sunscreen and lip balm (altitude sun can be intense)
- basic rain protection
If you’re choosing between two items, pick the one that helps you stay warm and dry. That’s what turns a long day into a survivable day.
Who this trek suits best (and who should think twice)
Best suited to fit, active travelers is how it’s described, and that’s accurate. If you can hike multiple hours, handle steep sections, and you’ve prepared for altitude risk, you’ll likely enjoy the challenge.
This is also a good pick if you:
- want a guide-led plan with small-group coordination
- prefer bundled logistics over total DIY
- like the idea of a flight segment to recover after tough trekking days
- value safety and route management more than total freedom
You might want to think twice if you:
- are newer to high-altitude trekking
- can’t commit to early starts on key days
- expect a relaxed pace
Should you book this Annapurna Circuit + Tilicho Lake detour?
I’d recommend booking if you match the trip’s core promise: active trekking + guide-led support + real altitude days. The combination of permits, meals, teahouse lodging, porter support, and the Jomsom–Pokhara flight makes it easier to focus on the mountains rather than the paperwork and transport puzzles.
I’d hesitate only if you’re unsure about fitness or altitude readiness. This route is built around climbs and pass country, and the plan even flags extreme snow risk on the Thorung La Pass day. If you’re comfortable with that reality and you like structured support, this is a strong way to experience the Annapurna Circuit with a Tilicho detour without turning your trip into a logistics project.
FAQ
What time does the tour start?
The meeting start time is 8:00 am.
Is airport pickup and drop-off included?
Yes. Airport pickup and drop-off are included as mentioned in the itinerary.
How many people are in the group?
The maximum group size is 8 travelers.
Does the price include the Jomsom–Pokhara flight?
Yes, the Jomsom–Pokhara flight is included.
Are permits included?
Yes. You’re covered for the Annapurna Conservation Area Permit and TIMS.
What meals are included during the trek?
Breakfast is included for 13 days, and lunch and dinner are included for 11 days each, as listed in the package details.
Is accommodation in Kathmandu included?
No. Accommodation in Kathmandu is not included.
Are porters provided?
Yes. There are necessary porters with a ratio of 1 porter for 2 travelers to carry personal gear and group equipment.
Is travel or medical insurance included?
No. Travel and medical insurance are not included in the package.
Is the international flight ticket included?
No. International flights are not included.