REVIEW · EVEREST BASE CAMP TREKS
Gokyo to Everest Base Camp Trek
Book on Viator →Operated by Ace the Himalaya · Bookable on Viator
High passes and big Everest views, packed together. This trek strings together Lukla and Namche with the calmer grandeur of Gokyo Lakes, then pushes you over Cho La and up to Kala Patthar and Everest Base Camp. I love the Gokyo Lakes detour and the early starts that help you dodge the worst weather and crowds. One drawback: you’re still at the mercy of conditions high on the route, so the plan may shift when the mountain decides otherwise.
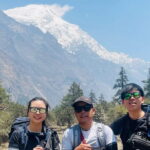
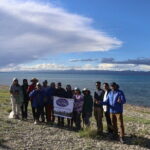
I also like how the trip is run like a real mountain operation, not just a sightseeing schedule. Guides such as Nima and Raj Kumar (and others like Raj N, Ramesh, Ganesh, and Lakpa Sherpa) are repeatedly described as flexible and safety-first, with itinerary timing adjusted when snow or storms hit. With a maximum group size of 15 and a porter setup of 1 porter for every 2 clients, it’s built to keep you moving without turning your lungs into a bargaining chip.
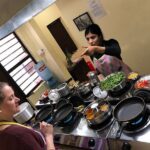
Finally, the included items reduce the hassle of packing and renting. You get a down jacket and sleeping bag for the trek (returned at the end), plus filtered water via a Katadyn Pocket Water Filter and even seasonal fruits along the way. Just be aware you’ll still need your own personal trekking equipment, and Kathmandu meals aren’t included.
In This Review
- Key things that make this trek work
- Why the Gokyo-to-Everest Circuit feels different
- Price and Logistics: what the $2,200 covers (and what it doesn’t)
- Lukla flight and Namche acclimatization that actually matters
- Phortse and Machhermo: the quieter climb toward the Ngozumpa area
- Two nights in Gokyo, then Gokyo Ri at 5,483 m
- Cho La Pass and Thangnag: where timing beats weather
- Everest Base Camp at 5,365 m plus Kala Patthar’s 5,555 m payoff
- Descent through monasteries to Namche, then Lukla and Kathmandu
- What to pack, what’s covered, and how to handle altitude days
- Who this trek suits best (and who should reconsider)
- Should you book this Gokyo to Everest Base Camp trek?
- FAQ
- How long is the trek?
- Where does the trip start and end?
- What group size is used for this trek?
- Are meals included?
- What gear is included, and what should I bring myself?
- Do I get porter support?
- What is the highest point on the trek?
- What if weather is poor?
- Can I get a refund if I cancel?
Key things that make this trek work

- Gokyo Lakes plus Gokyo Ri (5,483 m) for panoramic views without needing mountaineering gear
- Cho La crossing near 5,300 m with an early start so you’re moving before the midday mess
- Everest Base Camp at 5,365 m on foot, with a big day over glacier terrain
- Kala Patthar (5,555 m) as the hardest payoff day for classic Everest angles
- 1 porter for every two clients to help balance loads and energy
- Down jacket, sleeping bag, and Katadyn filter included so you pack smarter
Why the Gokyo-to-Everest Circuit feels different
This is the Everest Circuit style trek that takes the road less traveled, at least compared to the most direct Everest Base Camp routes. The big idea is simple: you go past Namche into classic Khumbu country, then swing west to Gokyo, cross the high Cho La pass, and finally land on Everest Base Camp and Kala Patthar.
What I like about this route for your experience is pacing and variety. You get multiple “reward moments” before you ever reach Everest Base Camp—first around Namche’s acclimatization rhythm, then at Gokyo Ri, then again the day you cross Cho La, and finally at Kala Patthar. It spreads out the big moments instead of concentrating all the effort into one or two days.
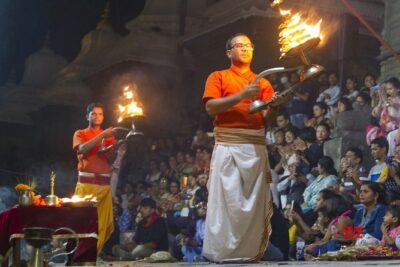
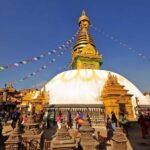
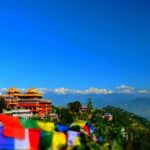
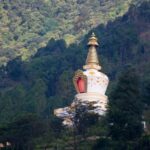
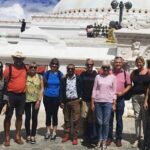
The other win is cultural and nature contrast. You’ll pass through Sherpa towns and monasteries along the way, and you’ll spend time around Sagarmartha National Park. It’s not just altitude tourism; it’s also trekking through the working lives and beliefs of the people who call this region home.
You can also read our reviews of more hiking tours in Kathmandu

Price and Logistics: what the $2,200 covers (and what it doesn’t)
At $2,200 per person for about 17 days, this isn’t a cheap trek—but it’s also not just paying for a guide and a prayer flag. The included package covers the core costs that usually blow up a DIY plan: permits, a licensed English-speaking trekking guide, porter support (1 porter per 2 clients), Kathmandu hotel stays, and the Kathmandu–Lukla–Kathmandu flights.
You also get practical inclusions that matter on the trail:
- Airport transfers in Kathmandu
- Twin-share or double room in a three-star hotel in Kathmandu for 2 nights
- Guesthouse accommodations for 14 nights, with attached toilets listed for Lukla, Phakding, and Namche
- All government taxes, VAT, and official charges
- Meals on the trek (breakfast 16 times, lunch 14 times, dinner 14 times)
- Filtered water on the trail via Katadyn Pocket Water Filter
- Down jacket and sleeping bag for trek use (to be returned)
- Seasonal fruits
What isn’t included is equally important. Kathmandu lunches and dinners aren’t included, and you’ll want travel insurance that covers emergency high-altitude rescue and evacuation. Alcoholic and non-alcoholic drinks (hot and cold) aren’t covered, and tips for trekking staff and drivers are expected. You’ll also need to bring personal trekking equipment.
My take on value: if you add up guide time, permits, porters, and the Lukla flight, the price starts to look like what you’d spend to build it yourself—except this comes with timing and mountain experience. The main cost risk on any Everest trek is weather, not price. With this route, you’re paying for planning that accounts for that reality.
Lukla flight and Namche acclimatization that actually matters
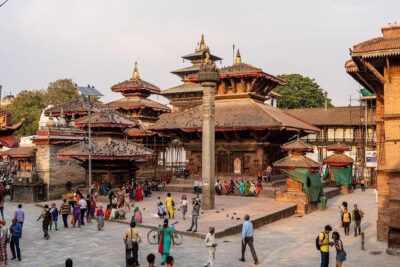
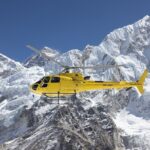
Your trek starts in Kathmandu, with pickup arranged at Tribhuvan International Airport. After a night in Kathmandu (hotel included), you fly to Lukla. That flight jump to Lukla is short but instantly intense: you go from city air to high-altitude trekking territory in minutes.
From Lukla, you head into Phakding. Expect a day that’s as much about settling in as it is about distance. The trail involves plenty of suspension bridge crossings over the Dudh Kosi River, with prayer flags on many spans. It’s a good early taste of Khumbu trekking rhythm: walk, pause, breathe, repeat.
Then comes Namche Bazaar. This part is crucial. Namche isn’t just a pretty stop—it’s your acclimatization engine. You spend a full day there to adjust to thinning air and to explore local life, including a museum highlighting Sherpa customs. The museum day matters because it breaks up stress. You’re not only resting your body; you’re also keeping your mind busy so you don’t obsess about every breath.
A practical point: plan on this to feel harder than you expected, even if you’re fit. Altitude doesn’t care about your cardio routine. Your guide’s job is pacing and safety decisions, and the trip’s structure supports that—shorter stretches when needed, and a dedicated acclimatization day before you go higher.
Phortse and Machhermo: the quieter climb toward the Ngozumpa area
After Namche acclimatization, you move toward Phortse. The trail climbs out of the valley through rhododendron forest and then through higher vegetation zones as you gain altitude. The route description also signals something important: this isn’t a flat stroll. Even when days don’t look crazy on paper, the vertical gains add up at these elevations.
Phortse is a good “breather village.” It’s not as busy as Namche, and it gives you a change of scenery without skipping the work your body needs. From there you continue to Machhermo, climbing ridges that offer views both back toward the valleys and forward toward the big peaks in the area. This is the kind of trekking day where your pace becomes more important than your speed—stop when you need to, and keep moving steadily.
One thing I’d watch for here: fatigue management. By the time you’re nearing Machhermo, your legs are getting used to the grind, but you’re also starting to feel altitude effects. If you’re the type to push too hard early, this is where you’ll feel it later. The best strategy is simple: treat these days as training for the high-pass days to come.
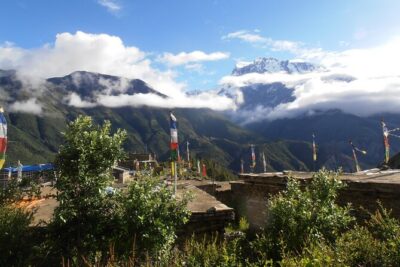
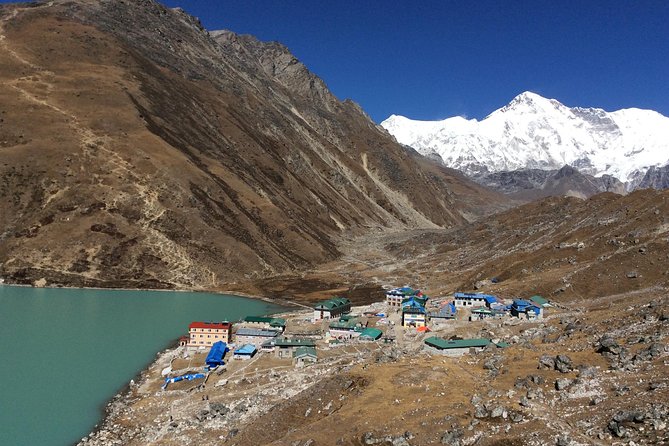
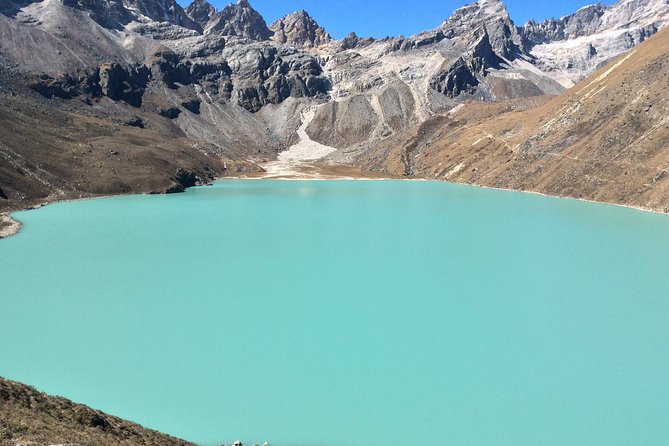
Two nights in Gokyo, then Gokyo Ri at 5,483 m

You finally reach Gokyo (4,790 m), one of the main destinations of this trek, and the trip gives you two nights there. That matters. Instead of a drive-by photo stop, you get time to explore around Gokyo and let your body adapt to the higher elevation.
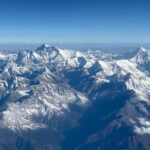
The centerpiece is the early climb to Gokyo Ri, topping out at 5,483 m. The pull is obvious: you get sweeping views across the Gokyo valley and toward major Himalayan peaks in the region. This is also where the trek earns its reputation for being worth the effort even before you reach Everest Base Camp.
What I like for your experience is the split: you hike to a big viewpoint, then you return and recover around the lakes area. That recovery time reduces the chance you arrive at Cho La already cooked.
In terms of what to expect, mornings here are the deal. Guides often schedule these early climbs because wind and visibility shift during the day. Even if clouds show up later, early starts help you catch the views you traveled for.

Cho La Pass and Thangnag: where timing beats weather
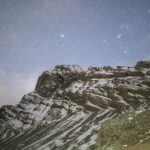
Cho La is the high pass crossing that defines this version of the Everest Circuit. The route starts before sunrise—around 4:00 or 5:00 am—so you can reach the pass by late morning and then cross before noon weather turns unpredictable.
Getting to the pass requires a prior day of staging. You trek to Thangnag first, and lodging there is described as very basic, including dormitory-style rooms because of the remoteness. Translation: go in mentally prepared. If you’re expecting comfort, you’ll be disappointed. If you’re expecting a “base to wake up early from,” you’ll be fine.
Crossing Cho La at around 5,300 m (the pass is described around 5,300 m and referenced as 5,330 m in the overview) is demanding. Even if you’ve done high treks before, the altitude and exposed conditions change the tempo of everything—breathing, footing, and decision-making.
For a smooth day here, you rely on three things:
- Your guide’s timing choices
- Your willingness to move slowly and carefully
- Your respect for weather and turnaround decisions
The earlier start isn’t just about avoiding bad visibility. It’s about giving yourself a bigger margin if conditions shift on the pass.
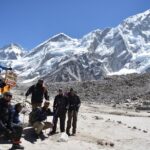
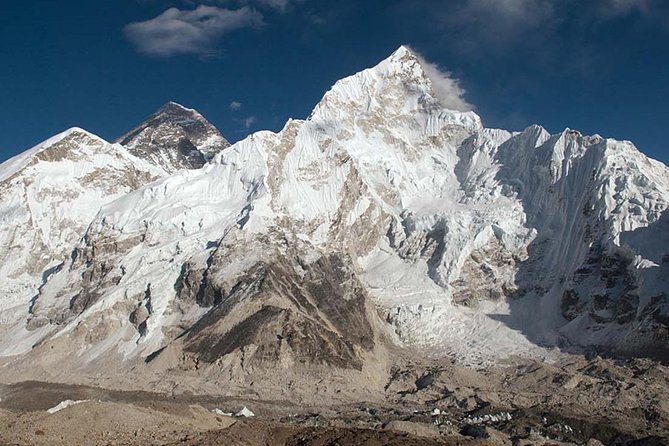
Everest Base Camp at 5,365 m plus Kala Patthar’s 5,555 m payoff
From Cho La, the route continues to Lobuche. The description suggests a comparatively easier and shorter trekking section, which is smart: you’re setting up your body for the big effort days ahead.
Then comes Everest Base Camp. The day walk to Base Camp is described as big and difficult, involving glacier terrain and the walk uphill to 5,365 m. The key value here: you get as close as possible to Everest without needing mountaineering equipment. You’re still walking in serious altitude territory, but the trip is built as a trekking challenge, not a technical climbing expedition.
You’ll likely feel the day in your lungs. That’s normal. The trick is steady steps and not getting pulled into racing the group. The glacier sections can be mentally tiring too, because you’re always watching your footing and managing your pace.
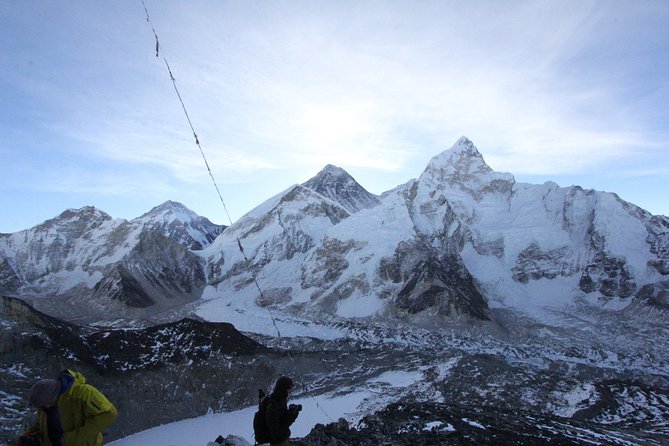
The next day is Kala Patthar (5,555 m). This is the hardest yet most rewarding day on the trek. Most of the morning is described as climbing the peak, and you get the classic photo-worthy angle on Everest and surrounding giants. It’s not a “maybe we see something” kind of day. It’s a “work hard, then be rewarded” day.
If weather cooperates, Kala Patthar is where this entire circuit clicks. Even if your legs feel wrecked, the payoff is why people sign up in the first place.
Descent through monasteries to Namche, then Lukla and Kathmandu
After Kala Patthar, you descend back down toward Namche through Pangboche and Tengboche. These are notable stops because the trek passes Buddhist monasteries in the area. Even if you don’t plan to spend hours inside, it’s a chance to see the spiritual fabric of Khumbu villages—prayer wheels, flags, and the sense of a community that has lived with this mountain for generations.
You return to Namche in the afternoon and get a more relaxed day afterward. The last trekking day heads back to Lukla, which is emotionally big even if it’s physically still work. The itinerary is framed as a group reflection day, which is a good idea. By then, you’ve survived high passes, multiple days above 4,000 m, and at least one peak climb that tested your patience.
Then you fly back to Kathmandu. You get the last look at the mountains from the air, and then you’re transferred back to your starting hotel. The trek is over, but the altitude stays in your memory. I’d plan your first Kathmandu evening as low-key. Your body will appreciate the calm.
What to pack, what’s covered, and how to handle altitude days
The trek includes down jacket and sleeping bag, and it includes filtered water on the trail. That’s a big help, because it reduces both weight and cold-weather risk. Still, you’ll need your personal trekking equipment. Think traction, layers, rain protection, and a daypack that works for long morning departures.
Here’s how I’d think about altitude on this route using what the itinerary sets up:
- You have a dedicated acclimatization day in Namche.
- You have a two-night buffer in Gokyo.
- You have early starts built into key high-elevation days (Gokyo Ri and Cho La).
- You have harder days (Everest Base Camp and Kala Patthar) placed after time for adaptation.
That sequencing is the real safety net. It’s not that altitude is easy. It’s that the trip design tries to reduce the chance you rush your body.
One more practical point: your water setup. Since the trek includes a Katadyn Pocket Water Filter, you don’t need to plan bottled-water logistics on the trail. You’ll still want a reliable bottle system and a routine for drinking, especially on long early starts when you forget you’re thirsty until it’s too late.
Who this trek suits best (and who should reconsider)
This is for you if you want a serious Everest trek with a classic checklist of goals: Namche, Gokyo Lakes, Cho La, Everest Base Camp, and Kala Patthar. It’s also for you if you like structure—early starts, paced acclimatization, and a crew that adjusts when conditions change.
I’d think twice if you can’t handle long trekking days at high altitude. The route repeatedly reaches elevations where effort feels bigger than you expect, including days that start before sunrise and a Base Camp day over glacier terrain. If you’re expecting a comfortable lodge vacation with short walks, this isn’t that.
Also consider your insurance. The trip includes permits and logistics, but it doesn’t cover emergency high-altitude rescue and evacuation. Bring coverage that specifically mentions high-altitude trekking, not just generic travel insurance.
Should you book this Gokyo to Everest Base Camp trek?
Book it if you want the full Everest Circuit experience with the extra payoff of Gokyo—plus a route that’s designed around acclimatization and early-morning passes. You’re paying for real logistics: guide, porter support, permits, the Lukla flight, meals on trek days, and cold-weather sleep gear.
Don’t book it if weather risk would stress you out too much. This trek requires good conditions, and if weather forces a change, you’ll be dealing with the mountain, not a hotel scheduler.
If you do book, lock in your preparation: train for uphill endurance, pack smart for cold nights even with the provided sleeping gear, and listen to your guide on pace and safety. The effort is real, but the rewards—Gokyo Ri views, Cho La crossing day, and Kala Patthar—are exactly the kind of memories that stick.
FAQ
How long is the trek?
The trek runs about 17 days.
Where does the trip start and end?
It starts at Tribhuvan International Airport in Kathmandu, and it ends back at the meeting point in Kathmandu.
What group size is used for this trek?
The maximum group size is 15 travelers.
Are meals included?
Yes. Breakfast is included 16 times, and lunch and dinner are included 14 times each. Meals in Kathmandu are not included.
What gear is included, and what should I bring myself?
The tour includes a down jacket and sleeping bag for the trek (returned at the end). Personal trekking equipment is not included, so you’ll need to bring your own.
Do I get porter support?
Yes. There is 1 porter for every two clients.
What is the highest point on the trek?
Kala Patthar is described at 5,555 m, with Gokyo Ri at 5,483 m and Cho La crossing around 5,300 m.
What if weather is poor?
This experience requires good weather. If it’s canceled due to poor weather, you’ll be offered a different date or a full refund.
Can I get a refund if I cancel?
Yes. You can cancel up to 6 days in advance for a full refund. Cancelling 2–6 days before gives a 50% refund, and cancelling less than 2 days before is not refunded.