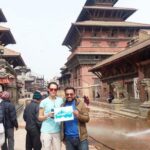
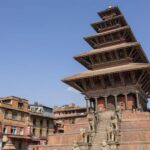
REVIEW · EVEREST BASE CAMP TREKS
Everest Base Camp Trek Via Gokyo Lake and Cho La Pass
Book on Viator →Operated by Marvel Treks and Expedition · Bookable on Viator
Cho La Pass turns this into a tougher, bigger Everest trip. You get Everest Base Camp plus Gokyo Lakes, then cross the dramatic Cho La glacier pass for views most treks never see.
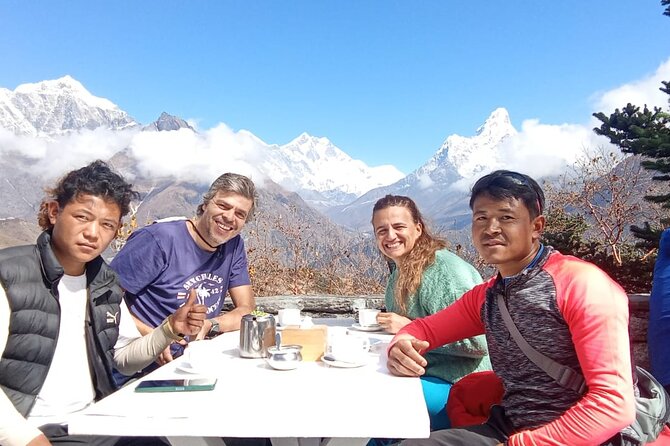
I love the way this route mixes the classic Khumbu story with quieter high-altitude lake time.
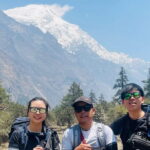
I also like the practical setup: flights in and out of Lukla, teahouse meals included, and a licensed English-speaking guide with a porter support team.
One thing to consider is that you are stacking altitude days and big early mornings, including an early Cho La Pass crossing—if you get cold easily or slow down at altitude, you’ll want to take acclimatization seriously.
In This Review
- Key Points to Know Before You Go
- Why This Everest Route Hits Three Big Highlights
- Price and Value: What $1,000 Covers on the Ground
- Getting There: Kathmandu, Gear Check, and the Lukla Flight Reality
- Namche to Tengboche to Dingboche: Building Altitude Without Freaking Out
- Lobuche, Gorak Shep, and Kala Patthar: The Classic Everest Grind
- Cho La Pass Early Morning: Glacier Crossing and the Gokyo Shift
- Gokyo Lakes and the Viewpoint Climb: More Peaks, More Light
- The Descent Back: Namche, Hot Shower Time, and Lukla on the Dudh Koshi
- Safety, Altitude, and Pace: How This Trip Tries to Keep You Steady
- Teahouses, Meals, and Comfort at High Elevation
- What to Pack (and What You Can Rent in Kathmandu)
- Who This Trek Suits Best (and Who Should Rethink It)
- Should You Book This Everest Base Camp via Gokyo and Cho La Pass Trek?
- FAQ
- How long is the trek?
- Are meals included on the trek?
- What permits are included?
- Do I need to bring my own trekking gear?
- What kind of guide and support do you get?
- How do the flights work between Kathmandu and Lukla?
Key Points to Know Before You Go
- Cho La Pass + Gokyo Lakes: a second world on top of the usual Everest trek.
- A classic Everest rhythm: Namche to Tengboche to Dingboche to Kala Patthar and Base Camp.
- Teahouses with meals included: breakfast, lunch, and dinner handled during the trek.
- Real logistics, not guesswork: domestic flights Kathmandu–Lukla–Kathmandu plus airport transfers.
- Support built in: licensed English-speaking guide and porter service with an emergency-oxygen safety plan.
- Memory-makers, not just miles: Everest View Hotel option at 3,880m, plus sunrise at Kala Patthar.
Why This Everest Route Hits Three Big Highlights
This trek is basically Everest Base Camp, but with two extra punches: Gokyo Lakes and the Cho La Pass crossing. Instead of only chasing the usual Everest silhouettes, you’ll also spend time in a high-altitude lake basin where the light changes fast and the air feels cleaner.
I like that the itinerary doesn’t treat those pieces as separate adventures. The trek builds your body and your mind for the hard stuff: first you move through Sherpa villages and Sagarmatha National Park, then you gain altitude step by step, and later you spend two days in the Base Camp region before cutting over to Gokyo. It gives you a sense of progress instead of nonstop grind.
The best part is the variety. You’ll walk through pine forest near Tengboche, then switch to colder alpine terrain, follow glacial paths toward Base Camp, and finally wake up for an icy pass morning before descending into the quiet Gokyo Valley. That mix is exactly why this route feels more complete than the standard Everest-only version.
You can also read our reviews of more hiking tours in Kathmandu

Price and Value: What $1,000 Covers on the Ground

At $1,000 per person for 14 days, the value comes from what you don’t have to assemble yourself. You get round-trip domestic flights (Kathmandu–Lukla–Kathmandu), 1 night hotel in Kathmandu with breakfast, and all meals during the trek. You also get teahouse lodging for 12 nights on a twin-sharing basis.
Permits matter too. This includes Sagarmatha National Park and TIMS permits, so you’re not juggling paperwork mid-trip. You also get airport transfers, which sounds small—until you arrive in Nepal tired and trying to find the right vehicle.
Where you should budget extra is mostly on the edges: international airfare and Nepal visa fee are not included, and personal trekking gear isn’t included (though you can rent gear in Kathmandu). Hot showers, Wi‑Fi, and battery charging at teahouses may cost extra too. Tips for the guide and porter are also expected, even if optional in strict policy language.
So the real question isn’t just cost. It’s whether you want someone else handling permits, meals, and the core logistics. If yes, this price can feel fair. If you prefer to DIY everything, you’ll probably have a different cost profile.
Getting There: Kathmandu, Gear Check, and the Lukla Flight Reality
Your trip starts in Kathmandu with a guide meeting you at Tribhuvan International Airport. You’ll do a trek briefing and gear check, plus you’ll get your duffel bag for trekking gear. That’s useful because it helps you keep the heavy stuff with your porter while you carry only what you need day-to-day.
Then comes the flight to Lukla. This is one of those Nepal moments where the travel method is part of the experience. You fly morning scenic skies to Lukla, then begin trekking through Sherpa villages toward Phakding. The route is designed to get you moving right away, not spending days just traveling around.
Two practical thoughts:
- Pack for cold and wind fast. Lukla days can start mild and then turn sharp as you gain elevation.
- Keep essentials in your daypack. You’ll be doing long walking days, and you don’t want your gloves or sunscreen buried.
In short, this section is about getting you set up so the actual trek days feel like trekking, not chaos.
Namche to Tengboche to Dingboche: Building Altitude Without Freaking Out
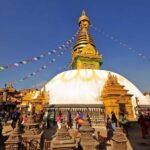
The first deep trekking day lands you in Namche Bazaar area. You’ll cross suspension bridges and enter Sagarmatha National Park, and this is where you get your first big Everest glimpses. Namche isn’t just a town—it’s a staging point where the trail begins to feel serious.
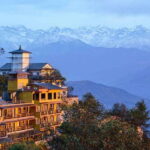
Day 4 includes an optional hike up to the Everest View Hotel at 3,880m. Even if you don’t make the full hike, the idea is good: use altitude time to acclimatize while still seeing real views.
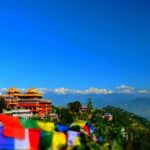
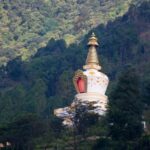
Then you head toward Tengboche. The walk runs through pine forest with views of Thamserku and Everest. Tengboche Monastery is a highlight here. It’s one of the best places in the Khumbu area for a cultural pause: prayer flags, monastery walls, and a different tempo than the trekking grind.
Day 6 brings you to Dingboche, crossing Imja Khola and passing Pangboche. Here the altitude starts to feel more physical. Your body notices every step. It’s not about panic; it’s about pacing, steady breathing, and letting rest stops work.
The tradeoff in this section is time on your feet. Some days run long (the schedule includes long walking time blocks), but the reward is that you’re gaining height in a structured way rather than rocket-lifting yourself toward high passes.
Lobuche, Gorak Shep, and Kala Patthar: The Classic Everest Grind
From Dingboche you continue toward Lobuche, walking through alpine terrain and past memorials of climbers. That portion hits hard for a lot of people because it’s a reminder that Everest is not a movie. It’s weather, risk, and time.
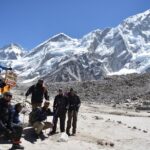
Then you reach Gorak Shep and head toward Base Camp by following the Khumbu Glacier. You’ll arrive at Base Camp for photos and that rare feeling of achievement—then you return to Gorak Shep. The round-trip nature matters. You’re not just reaching a point; you’re investing energy and managing breath on the way there and back.
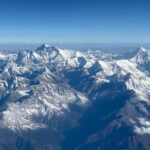
Day 9 is the sunrise day from Kala Patthar. That’s a big deal for most Everest trekkers for one reason: you get wide mountain views when the light is low and the air is calm. After sunrise, you trek down toward Lobuche and onward to Dzongla.
This part of the trek has two real considerations:
- It’s cold. Early mornings turn layers into a survival plan.
- Your appetite might change as altitude rises. Stick to steady meals in teahouses, even if you’re not hungry at first.
If you want the iconic Everest moment, this is where it happens.
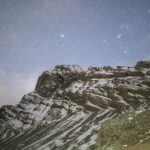

Cho La Pass Early Morning: Glacier Crossing and the Gokyo Shift
Day 10 is a key turning point. You cross the Cho La Pass early morning, then descend into the Gokyo Valley. That early timing is not random. It’s part of how glacier-pass mornings are managed, and it means you start before you fully feel awake.
After the intensity of Everest-side days, the Gokyo descent can feel like a reset. The valley is quieter, and the air often feels less crowded—mentally as well as physically. You keep walking, but the scenery shifts from the Base Camp grind to lake-basin serenity.
The possible drawback is obvious: this is the “adventure soul” section. If your balance is shaky or you’re anxious on icy terrain, tell your guide early and keep communicating. Good portering support and a steady pace matter a lot on passes.
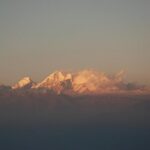
The payoff is that you now have access to a different set of big views. Everest is still nearby in your mind, but you’re also turning your attention toward Cho Oyu and the broader Himalayan skyline.
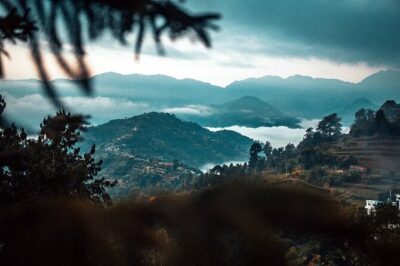
Gokyo Lakes and the Viewpoint Climb: More Peaks, More Light
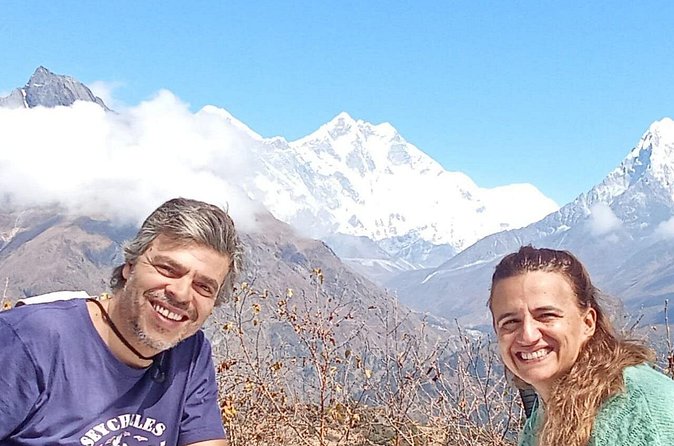
Day 11 focuses on panoramic perspectives. You do a morning climb for views of Everest, Cho Oyu, and Makalu, and then you visit the 3rd and 4th Gokyo Lakes.
I like this part because it changes what you’re looking at. Base Camp days are about the Everest story and glacier paths. Gokyo days are about motion in the water and how clouds behave at altitude. You’ll see how the light changes across the lakes and surrounding ridgelines, and that gives your camera a lot to work with.
This is also where you get a break in the pacing. It’s still demanding, but it’s not the same kind of “climb to a point, feel crushed, climb back” feeling as some Everest-side segments. It’s more about taking your time, stopping often, and enjoying the fact that you’re high enough to see far without it feeling like you’re always sprinting upward.
If you’re the kind of person who likes collecting moments—big view here, lake reflection there—this day delivers.
The Descent Back: Namche, Hot Shower Time, and Lukla on the Dudh Koshi
Day 12 heads back down through Machhermo, Dole, and Khumjung to reach Namche Bazaar. This is where you get a proper reset. The schedule even notes a chance for a hot shower and rest in Namche. (Just keep in mind that hot showers can be an extra cost depending on where you stop, since teahouse hot showers aren’t listed as included everywhere.)
Day 13 is a final trekking day along the Dudh Koshi River toward Lukla. This is a good moment to appreciate how far you’ve come. The river is like a timeline—proof you’re coming down from the high, thin air days and moving back toward civilization.
After your final trekking day, Day 14 brings an early morning flight to Kathmandu and some free time for rest or shopping. That free time is practical. You’ll want to sleep, soak in warm air if you can, and sort gear before any onward travel.
Safety, Altitude, and Pace: How This Trip Tries to Keep You Steady
This trek is listed for people with moderate physical fitness. That doesn’t mean it’s easy. It means the route is set up so the support team and acclimatization days give you a fighting chance.
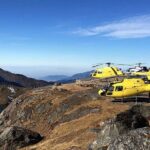
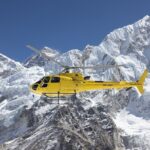
The itinerary includes structured climbs and rest/recovery periods, including the Namche area acclimation and the classic Base Camp-side steps. It also includes safety support with emergency oxygen mentioned as part of the plan. That’s important because altitude emergencies are time-sensitive.
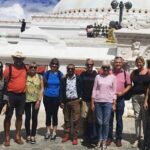
I also appreciate the support ratio. A licensed English-speaking guide plus a porter (with a 1:2 ratio) means you’re not hauling everything yourself. That’s huge when you’re tired and cold. Less weight makes altitude feel less brutal.
Your biggest job is simple:
- Walk slower than you think you need to.
- Drink water consistently.
- Tell your guide quickly if you feel off.
This is not the time to be a hero.
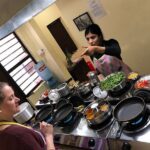
Teahouses, Meals, and Comfort at High Elevation
You’ll sleep in twin-sharing teahouses for 12 nights, and you’ll get breakfast, lunch, and dinner during the trek. That matters because it removes decision fatigue. At high elevation, your brain already runs hot and tired. Having meals included helps you focus on the day ahead.
But comfort has tradeoffs. Teahouses at elevation vary. Hot showers aren’t guaranteed as included, and Wi‑Fi or battery charging may cost extra. You’ll want to plan around cold mornings, limited electricity, and the fact that you’ll likely want a good sleeping setup to stay warm.
One practical tip: manage battery use. Take photos early in the day when temperatures are kinder to devices, then save power for later.
Also, the included meals can be a big relief if you don’t know Nepalese trekking food. You’ll have food reliably offered each day, rather than deciding on the fly whether to eat.
What to Pack (and What You Can Rent in Kathmandu)
Personal trekking gear isn’t included, but you can rent in Kathmandu. The gear list in plain terms is the stuff you’ll feel every day:
- boots you can trust on rocky trail
- a warm jacket for cold mornings
- trekking poles if you like stability
- gloves, hat, and layers for wind
- a daypack that fits your essentials
The duffel bag for trekking gear means you can pack smarter. Put bulky, non-daily items in the duffel and keep only what you need during the walk in your daypack.
Don’t forget weather reality. Nepal doesn’t need to be storming to be cold at altitude. Even on clear days, nights can bite.
Who This Trek Suits Best (and Who Should Rethink It)
This trip fits best if you:
- want more than one signature experience (Base Camp plus Gokyo plus Cho La)
- like a guided structure where meals, lodging, and permits are handled
- are ready for long walking days and early starts
- want Sherpa culture along the way and monasteries like Tengboche as a real stop, not a quick photo
You might think twice if you:
- get anxious on icy terrain (Cho La Pass is early and serious)
- struggle with altitude pacing and insist on moving fast
- expect frequent comforts like free hot showers or easy device charging
If you’re the kind of person who enjoys the slow, steady rhythm of high mountain trekking, this route will reward you.
Should You Book This Everest Base Camp via Gokyo and Cho La Pass Trek?
I’d book it if your dream Everest trip includes variety. You’re not just checking a box at Base Camp. You’re also collecting lake views, monastery calm, and the big glacier-pass moment.
It’s also a smart choice if you want your trip to feel organized without losing authenticity. Domestic flights through Lukla, teahouse meals, permits, and a real support team are the kind of setup that keeps you from wasting energy on logistics.
Before you commit, be honest about two things: altitude tolerance and cold comfort. If you handle both well, you’ll likely love how the days build into one long, memorable Himalayan arc—from Namche to Kala Patthar to Cho La to Gokyo.
FAQ
How long is the trek?
The overall experience is about 14 days, including flights and trekking days, with 1 night hotel in Kathmandu and 12 nights in twin-sharing teahouses during the trek.
Are meals included on the trek?
Yes. Breakfast, lunch, and dinner are included during the trekking portion of the journey.
What permits are included?
The trek includes Sagarmatha National Park permits and TIMS permits.
Do I need to bring my own trekking gear?
Personal trekking gear is not included, but you can rent trekking gear in Kathmandu. You’ll also receive a duffel bag for trekking gear that’s returned.
What kind of guide and support do you get?
You get a licensed English-speaking trekking guide plus a porter, with a 1:2 ratio.
How do the flights work between Kathmandu and Lukla?
Round-trip domestic flights are included: Kathmandu to Lukla and back to Kathmandu, plus airport transfers at arrival and departure.