REVIEW · EVEREST BASE CAMP TREKS
12 Days Everest Base Camp Trekking
Book on Viator →Operated by Blissful Himalayas · Bookable on Viator
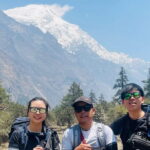
Everest feels close on this trek. You’ll fly into Lukla and then follow the classic Khumbu trail toward Everest Base Camp with Lukla as your jump-off point. It’s the kind of trip where the mountains do most of the talking, and the logistics still feel handled.
I love the built-in altitude rhythm: acclimatization in both Namche Bazaar and Dingboche, not just a rushed grind uphill. I also like the human touch—one reviewer specifically called out guide Ramchandra for thoughtful support and a trek that felt tailored to their needs.
The biggest consideration is weather timing and early starts, since mountain conditions can affect flights and the sunrise plan. If you’re the type who hates changing plans, plan to stay flexible.
In This Review
- Key highlights worth planning for
- Why This Everest Base Camp Trek Feels Well-run From Day One
- Kathmandu to Lukla: The Flight That Changes Your Pace (Day 1)
- Phakding to Namche Bazaar and the Suspension-Bridge Rhythm (Day 2)
- Acclimatize at Namche, Then Chase Views at Everest View Hotel (Day 3)
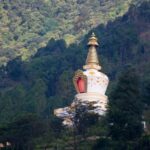
- Sagarmatha National Park Days: Views, Forest Switchbacks, and Ama Dablam on the Mind (Day 4)
- Dingboche Altitude Lessons and Optional Hikes (Days 5–6)
- Khumbu Glacier Terrain to Lobuche and Gorak Shep: Where the Trail Turns Rocky (Day 7)
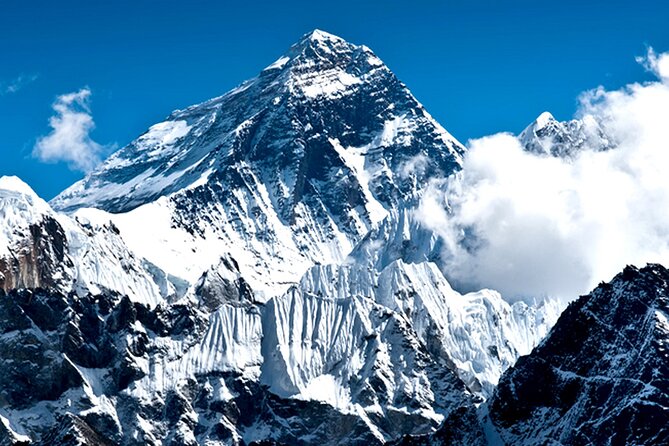
- Gorak Shep to Everest Base Camp: The Day of the Big Destination (Day 8)
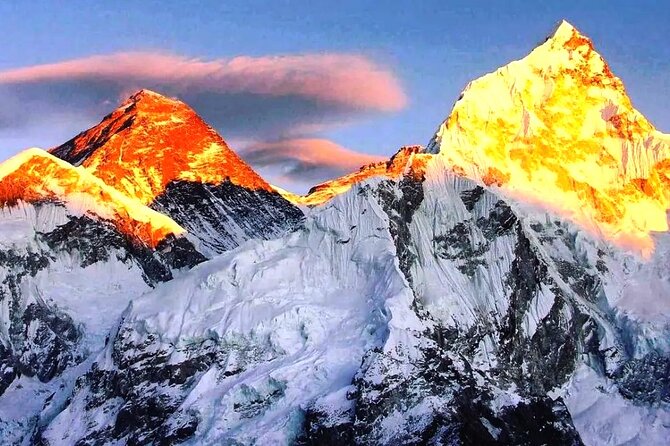
- Kala Patthar Sunrise: When the Cold Is Worth It (Day 9)
- Descending Carefully and Letting Your Knees Regroup (Days 10–11)
- Back to Kathmandu: Easy Flight, Real Meals, and a Farewell Dinner (Day 12)
- Price and Value: What You Actually Get for $1,399
- Who This Trek Fits Best (and Who Should Rethink It)
- Things to Pack and Know Before You Go
- Should You Book Blissful Himalayas for Everest Base Camp?
- FAQ
- How do airport transfers work for this trek?
- Are domestic flights included, and do you always fly from Kathmandu to Lukla?
- What does the trek price include for meals and lodging?
- Do I need to arrange trekking permits?
- Is a guide provided?
- Do they monitor altitude during the trek?
- Is a porter included in the price?
- Is international airfare or Nepal visa included?
- What kind of cancellation options are available?
Key highlights worth planning for
- Lukla flight included (or Ramechhap in peak season) so you skip the biggest travel uncertainty.
- Acclimatization days in Namche and Dingboche to reduce the risk of doing “too much, too soon.”
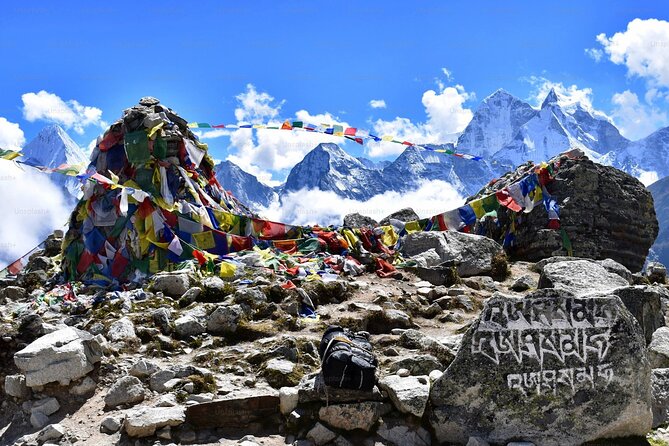
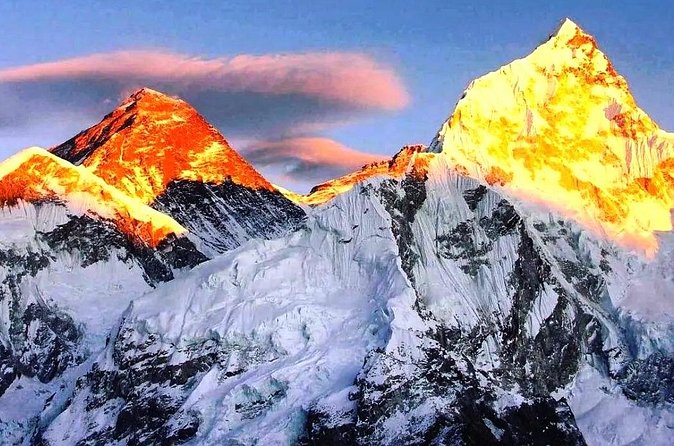
- Kala Patthar sunrise focus for the Everest viewpoint moment people dream about.
- Permits handled in advance (Sagarmatha National Park permit and TIMS card).
- Meals and teahouse stays included so your budget and daily routine stay predictable.
- Private group format: only your group, not a mixed crowd.
Why This Everest Base Camp Trek Feels Well-run From Day One
I like trekking trips where the hard parts are expected and managed. Here, the plan is built around the real Everest challenge: altitude, timing, and keeping you moving at a safe pace.
This is run by Blissful Himalayas, a long-running Nepal agency (in business since 2011). That matters because Everest routes don’t forgive sloppy details. When the schedule is organized, you spend your energy on walking and taking photos—not on scrambling for information.
And the reviews back up what I look for: solid organization and a guide who pays attention. One reviewer even named their guide, Ramchandra, and credited him with making the whole experience feel supported.
You can also read our reviews of more hiking tours in Kathmandu

Kathmandu to Lukla: The Flight That Changes Your Pace (Day 1)
Your trip begins in Kathmandu with pickup and transfers, then an early flight out of Kathmandu to Lukla at about 2,800m (9,184ft). Even if you’ve never flown into the Himalaya before, this is the moment where your brain switches from city mode to mountain mode.
After you land, you start trekking from Lukla toward Phakding. The first day is your “set the rhythm” day: walking time is listed at around 8 hours, but it’s structured to get you moving without throwing you straight into the steep stuff.
What’s practical here: you don’t have to piece together domestic transport on your own. That alone makes day one less stressful, especially if you’re arriving in Nepal with limited time.
Phakding to Namche Bazaar and the Suspension-Bridge Rhythm (Day 2)
Day two heads from Phakding up to Namche Bazaar, the main trading hub of the Khumbu region. The route includes several suspension bridges, and that’s more than scenery.
Those bridges are a rhythm-check for the trek: they force steady footing, remind you you’re on uneven terrain, and gently build that uphill tolerance you’ll need later. You’ll also climb gradually, which is exactly what you want early on.
The walking time is listed around 7 hours. That’s a good length for day two—long enough to feel you’re trekking, not so long that you’ll feel cooked before acclimatization.
Acclimatize at Namche, Then Chase Views at Everest View Hotel (Day 3)
If you want a smoother Everest experience, acclimatization days matter. Here, day three is built as a dedicated buffer in Namche Bazaar, with time to explore and adjust to altitude.
You can optionally hike up to the Everest View Hotel area for panoramic views of Everest and surrounding peaks. I like this kind of option because you can choose your effort level based on how you feel that morning, not what the calendar says.
This day is listed at about 8 hours total, but it’s not meant to be a suffer-fest. It’s your chance to slow down, check in with your body, and keep altitude sickness risk in mind as you go higher.
Sagarmatha National Park Days: Views, Forest Switchbacks, and Ama Dablam on the Mind (Day 4)
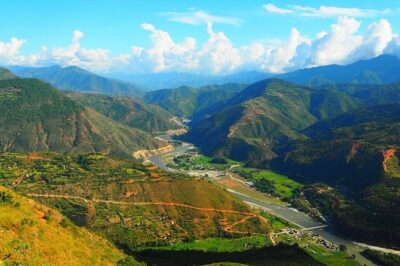
On day four, the scenery gets big quickly. You’ll trek through a portion of Sagarmatha National Park with panoramic views of Everest, Nuptse, and Ama Dablam along the way.
Then the route shifts down through rhododendron forest for about two hours before climbing back up to your next stop. That up-down sequence is valuable training. It teaches you how to manage effort while the terrain changes under your boots.
Walking time is listed around 8 hours. If you tend to charge uphill early, this is the day where you’ll want to pace yourself and save strength for the climb back up.
Dingboche Altitude Lessons and Optional Hikes (Days 5–6)

Days five and six focus on Dingboche, a village in the Khumbu Valley with excellent views across the region. The big advantage of this segment is that you get more than one chance to adjust.
- Day 5: You’ll trek from the previous area into Dingboche (about 8 hours). You get the high-valley feel and wide mountain views.
- Day 6: You spend the day acclimatizing (again about 8 hours listed), with optional hikes like Nagarjun Hill or Chukhung area options.
Why I like these built-in pause days: they’re the difference between a trek that feels controlled and one that feels like altitude roulette. You don’t need to max out every optional hike. You just need to follow the acclimatization plan and listen to your body.
These days also set you up mentally. Dingboche is where the “Everest is real” feeling turns from visual awe into physical effort.
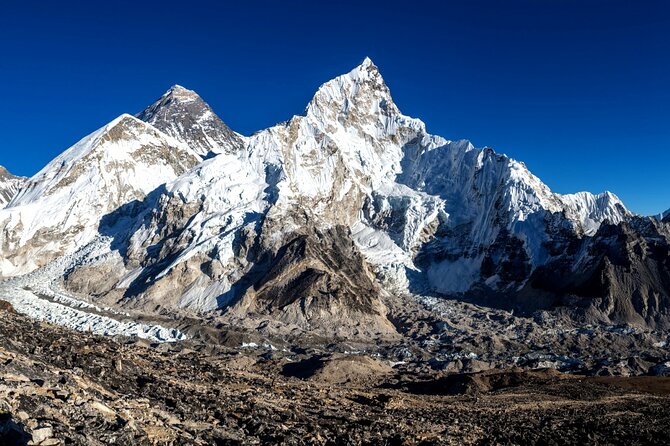
Khumbu Glacier Terrain to Lobuche and Gorak Shep: Where the Trail Turns Rocky (Day 7)
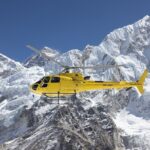
Day seven is an early start, crossing the Khumbu River and moving into rocky terrain and glacial moraines. The schedule includes about 8 hours of trekking, and it’s one of the more demanding-feeling transitions because the ground gets less forgiving.
You’re also heading toward Khumbu Glacier viewpoints, which is exactly why day seven is worth the effort. You’re moving through a section where the mountain landscape is less village-and-bridge and more high, raw, and dramatic.
This is also where I recommend you keep your day-pack habits tight. Drink consistently, eat small and often, and avoid saving all your snacks for “later.” Later on high terrain can mean later never happens.
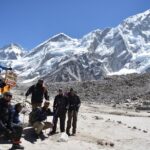
Gorak Shep to Everest Base Camp: The Day of the Big Destination (Day 8)
Day eight is where you finally reach the Everest Base Camp area. You’ll trek from Lobuche to Gorak Shep (about 9 hours), lunch there, then continue on to Everest Base Camp to explore and take in the place.
This is one of those days where timing and energy matter. You’ll have been walking for hours already by the time you reach base camp, so it helps that the plan builds in lunch and settling before the final push.
What you should know going in: teahouse life here is basic by design. You’re not “touring comfort”—you’re operating at altitude. That said, staying in twin-sharing teahouses and having meals covered means you’re not juggling logistics when you’re tired.
Kala Patthar Sunrise: When the Cold Is Worth It (Day 9)
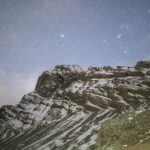
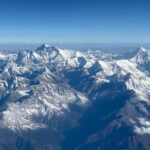
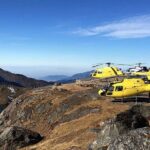
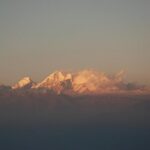
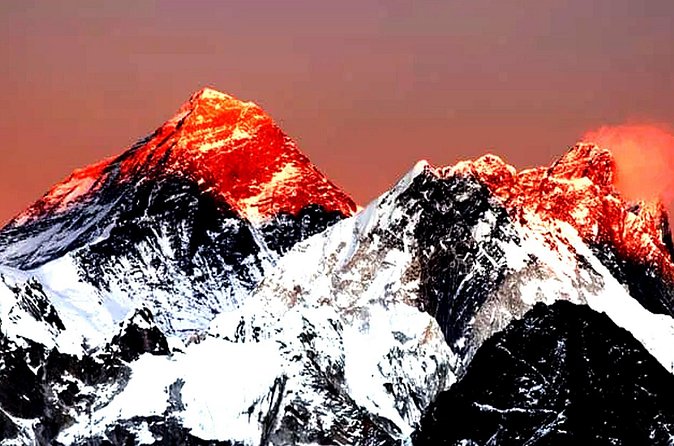
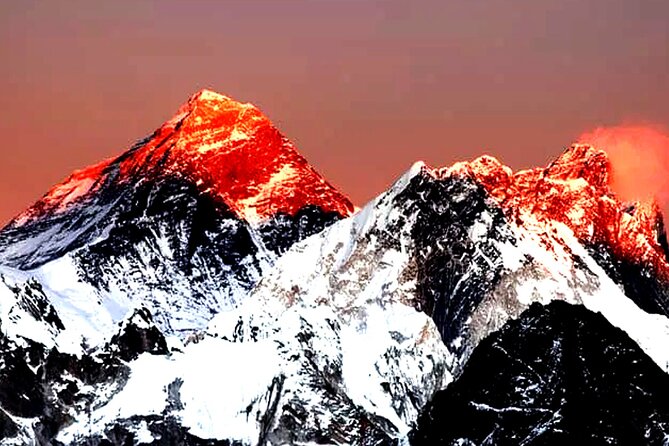
If Everest views are your reason for coming, day nine is your headline act. The plan includes a sunrise hike to Kala Patthar, described as one of the best places for views over Everest, Lhotse, and surrounding peaks.
The schedule also notes a helicopter landing at Kalapathar. That’s in the plan you’ll be following, so treat it as part of the day’s sequence rather than something you should count on as a personal ride-along.
Day nine is listed around 8 hours. Plan to be out early, and plan for cold mornings. The reward is the kind of sky-and-mountain moment that stays with you even after your legs forget it.
Then you return to Gorak Shep, eat, and reset for the descent.
Descending Carefully and Letting Your Knees Regroup (Days 10–11)
Days ten and eleven shift gears from climb to descent. The walking is still meaningful—about 8 hours on day ten and about 6 hours on day eleven—but the stress moves from breath and altitude to legs and knees.
The guidance here is simple and worth taking seriously: descend carefully, keep balance, and don’t let tired form turn into sloppy steps. If you’ve ever finished a long day downhill and wondered why your knees sound like they’re voting for retirement, you’ll understand this stage fast.
Day ten also includes enjoying the trekking scenery as you head back through the park area. Day eleven is your final trekking day with a shorter walk and an evening celebrating with your guide, porters (if you have them), and fellow trekkers. That matters because Everest treks feel like a series of “go, go, go” days. A proper finish gives you space to land.
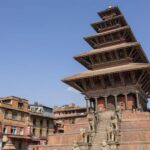
Back to Kathmandu: Easy Flight, Real Meals, and a Farewell Dinner (Day 12)
Your last day brings you back to Kathmandu via an early flight, then transfer to your hotel. From there, you get a leisure day rhythm: relax, explore if you want, and recover properly—feet and body messages are mentioned as an option.
The plan also includes a farewell dinner with the team. I like these end-of-trip dinners because they turn the logistics into relationships. It’s also where you’ll realize you didn’t just conquer a route—you survived a schedule full of variables, and did it with support.
Price and Value: What You Actually Get for $1,399
At $1,399 per person, this trek isn’t cheap, but it’s also not just “pay us and good luck.” The value comes from what’s covered:
- Domestic round-trip airfare between Kathmandu and Lukla (or Ramechhap during peak season)
- A one-night deluxe hotel in Kathmandu with breakfast
- Twin-sharing accommodation in teahouses during the trek
- All meals during the trek (breakfast, lunch, dinner, plus tea/coffee with breakfast)
- A licensed, experienced English-speaking trekking guide (including salary, meals, accommodation, equipment, and insurance)
- Permits (Sagarmatha National Park permit and TIMS card)
- A basic first aid kit, including a pulse oximeter for altitude-related monitoring
- Airport pickup and drop-off
- Government taxes and official service charges
What you should double-check mentally: international airfare and your Nepal entry visa fee are not included. Travel and medical insurance also isn’t included (though it’s strongly recommended). And tipping is not baked in, so you should plan to budget for that in a reasonable way.
So is this good value? For me, it’s strongest if you want your big moving parts covered: flights, permits, meals, guide support, and day-to-day structure. If you already have your own guide and can organize everything yourself for less, you might shop around. But if you want fewer headaches and a trek that runs like a system, this price aligns with what you’re getting.
Who This Trek Fits Best (and Who Should Rethink It)
This trek is best for people with moderate physical fitness who want a classic Everest route with a smart acclimatization structure. The schedule is demanding enough to be real, but it’s not built as a forced march every day.
It also suits you if:
- You like traveling with a guided plan and don’t want to manage permits and logistics yourself
- You want a private group format (only your group participates)
- You want altitude monitoring support (pulse oximeter included)
You might rethink it if:
- You hate cold, early mornings, and unpredictable mountain weather changes
- You expect lots of comfort or modern conveniences at higher elevations (teahouses here are basic)
Also, porter service is available upon request. If you know you’ll benefit from shared load, ask early instead of waiting until you’re already on the trail with tired shoulders.
Things to Pack and Know Before You Go
I can’t tell you exactly what you should buy for your body, but I can tell you what the trek environment demands.
Plan for:
- Cold mornings (especially for Kala Patthar sunrise)
- Uneven, rocky, and sometimes slippery footing during moraine sections and descents
- Layers you can adjust throughout the day as you climb and drop elevation
- A realistic day-pack routine so you’re not hunting for snacks and water mid-walk
And because meals are included, I recommend you bring just a few personal favorites for taste and comfort. Keep it simple. You’ll burn appetite fast up there.
Should You Book Blissful Himalayas for Everest Base Camp?
If you want Everest with less friction, I’d lean yes. The reasons are practical: the plan includes domestic flights, permits, guide support, meals, and teahouse lodging. It also builds in acclimatization days that make the whole trek feel more controlled than a straight climb.
The review themes you should pay attention to are strong organization and supportive guiding. One reviewer specifically praised guide Ramchandra for a trip that felt well organized and thoughtfully customized. That’s exactly the kind of detail that changes your stress level on an Everest trek.
My advice for your decision: if you’re ready for altitude management, early starts, and basic mountain accommodations, this is a solid way to do Everest Base Camp. If you need every day to be predictable and warm and easy, then pick a different kind of mountain trip.
FAQ
How do airport transfers work for this trek?
Pickup and drop-off in Kathmandu are included, covering your transfers to and from the airport.
Are domestic flights included, and do you always fly from Kathmandu to Lukla?
Round-trip domestic airfare is included between Kathmandu and Lukla. During peak season, the schedule may use Ramechhap instead.
What does the trek price include for meals and lodging?
Twin-sharing accommodation is provided in local teahouses during the trek. All meals during the trek are included, including breakfast, lunch, and dinner, plus tea/coffee with breakfast.
Do I need to arrange trekking permits?
No. The trek includes necessary permits, including the Sagarmatha National Park permit and the TIMS card.
Is a guide provided?
Yes. You’ll travel with a licensed, experienced, English-speaking trekking guide, and the guide’s salary, meals, accommodation, equipment, and insurance are included.
Do they monitor altitude during the trek?
A basic first aid kit is included, including a pulse oximeter to monitor altitude-related oxygen levels.
Is a porter included in the price?
Porter service is not included, but it’s available upon request.
Is international airfare or Nepal visa included?
International airfare is not included, and the Nepal entry visa fee is also not included (it’s available on arrival at the airport).
What kind of cancellation options are available?
You can cancel up to 24 hours in advance for a full refund. The experience also requires good weather, and if it’s canceled due to poor weather, you’ll be offered a different date or a full refund.