REVIEW · HIKING & TREKKING
Mardi Himal Trek
Book on Viator →Operated by Mission Himalaya Trekking · Bookable on Viator
Mardi Himal delivers big views for beginners. The trek’s main payoff is reaching Mardi Base Camp, where the Annapurna region opens up to big mountain angles and sky-level drama. I like that the route mixes forests, villages, and proper mountain viewpoints, not just a single long slog.
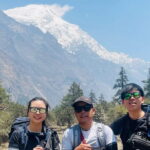
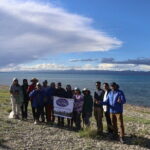
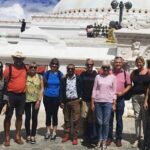
What really makes this trip easier to enjoy is the human support. You’ll travel with a licensed trekking guide and a strong porter team, and the guide names that show up again and again in past groups include Birendra, praised for warm hospitality and helpful photo stops.
One consideration: you still need to be ready for altitude and cold nights. Even with acclimatization and shorter days up high, you’re hiking multiple 5–7 hour days above 3000m, so light training helps a lot.
In This Review
- Key things that make this Mardi Himal Trek worth your time
- Mardi Himal: Why this trek is such a popular “first Himalayas” choice
- Kathmandu to Thamel: land softly before you start climbing
- The early flight to Pokhara and the drive toward Kande
- Deurali to Forest Camp: where the trail starts feeling real
- Above 3000m to Low Camp and back: acclimatization that actually matters
- The day that earns the whole trek: Mardi Base Camp at about 4500m
- Sidding: rhododendron and pine on the descent, with alpine breakfast
- Lwong day and the tea-garden morning in Pokhara
- Pokhara sightseeing day: Davis Waterfall and Gupteswor Mahadev
- Back to Kathmandu: a final guided look at the city
- Price and logistics: what you’re really paying for
- What to pack for cold nights and lodge living
- Who should choose this Mardi Himal Trek (and who might not)
- Should you book this Mardi Himal Trek?
- FAQ
- How long is the Mardi Himal Trek?
- Where does the trek start and end?
- Is Kathmandu included, or is it just the hiking part?
- What permits are included for the trek?
- Are domestic flights included?
- Do you get trekking gear like jackets or sleeping bags?
Key things that make this Mardi Himal Trek worth your time
- Mardi Base Camp around 4500m for the classic view moment
- ACAP and TIMS permits included, so you don’t scramble paperwork
- Acclimatization built in above 3000m, with shorter trekking days and hydration reminders
- Down jacket, sleeping bag, and duffel provided on request (returned after the trek)
- Route pacing can be adjusted when conditions feel tough, including knee-friendly timing
- Rhododendron and pine trails plus a mostly flat village day toward Lwong
Mardi Himal: Why this trek is such a popular “first Himalayas” choice
If you want Nepal without the extreme grind of some other treks, Mardi Himal is a smart pick. The trail is commonly described as beginner-friendly, yet you still get that real Himalayan payoff at the end. The best part is that the journey feels scenic in layers: village life, forest color, viewpoint stops, then that final push to Mardi Base Camp.
I also like how this itinerary respects altitude. You don’t just climb day after day. You get days where the hiking time is reduced and the plan nudges you toward hydration and steady pacing. That matters, because even if you feel strong on day one, the air changes after you’re living above 3000m.
And there’s good value baked into the format: domestic flights, permits, guide and porter support, and most meals are included. It’s not cheap, but you’re paying for the friction to be removed—especially once you’re on the trail.
You can also read our reviews of more hiking tours in Kathmandu

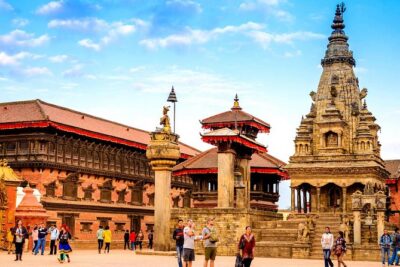
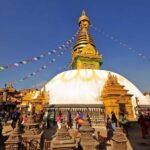
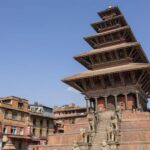
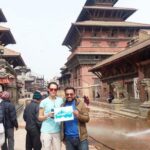
Kathmandu to Thamel: land softly before you start climbing

Your tour starts in Kathmandu with an airport meet-and-drive to Thamel. That’s practical. You arrive, you get oriented, and you can focus on sleep and getting your basics together rather than figuring out transport.
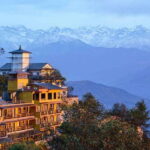
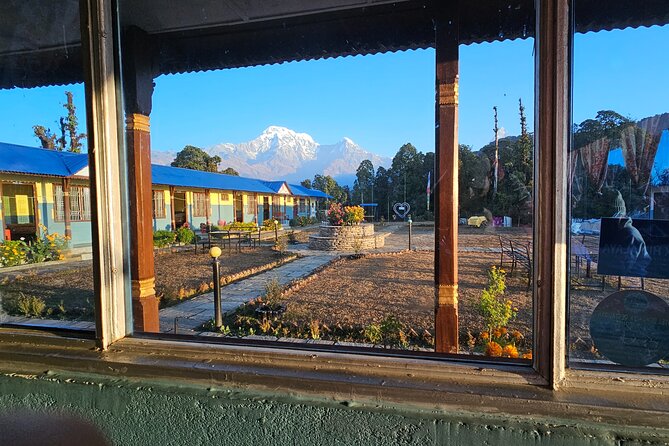
In Kathmandu, you stay at a 3-star hotel with breakfast. That’s helpful for trekking days because you can eat properly and keep your routine simple. You’ll also have time later for a guided walk around Kathmandu with a town guide.
This early buffer matters because the second major move is the flight to Pokhara. If you show up tired and stressed, you’ll feel it immediately.
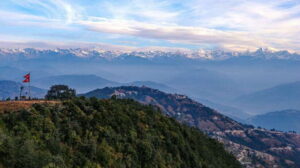
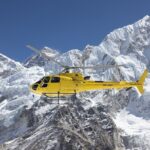
The early flight to Pokhara and the drive toward Kande
On day two, the plan is to catch the earliest morning flight from Kathmandu to Pokhara. Getting a morning start helps. You lose less daylight on travel and get the trek legs moving sooner.
After landing, you drive to Kande, which sets you up to start walking without a long multi-hour scramble through the city. This day is described as relatively easy and mostly about settling into the trekking rhythm. Even if you’re excited, keep your effort controlled. Your body is about to learn a new pace, and day two is where you help it learn that lesson.
A nice detail for comfort and logistics: the tour includes ground transfers by private vehicle, and the domestic flight tickets include the guide as well. That reduces the little coordination gaps that can turn travel into a scavenger hunt.
Deurali to Forest Camp: where the trail starts feeling real
From Pokhara, the trek pushes onward to the Deurali area. Day three includes a hearty mountain meal in Deurali before you begin the climb toward Forest Camp (about 6 hours).
This section is where Mardi Himal starts to feel like a trek, not a hike. You’re moving from the easier beginning into a more continuous effort, and the scenery shifts as elevation rises. Expect a mix of paths and forest time that helps you settle into the altitude rather than jumping straight into steep climbing.
Also, this is where the “novice-friendly but not boring” balance shows. You’re building stamina, but you’re not just staring at rocks. Forest segments help break up the effort and keep your mind busy while your legs do the work.
Above 3000m to Low Camp and back: acclimatization that actually matters
Day four is where the tour becomes altitude-aware in a very direct way. Since you’re above 3000 meters, the itinerary notes that the distance covered may be slightly reduced. After breakfast, the plan goes through mixed woodland, with lunch at Low Camp.
This is exactly what you want to see in a trekking plan. Reduced distance above 3000m is not laziness. It’s strategy. Your body needs time to adjust to lower oxygen, and your trekking pace should change too. If you treat day four like you’re training for a race, altitude will punish that.
Day five continues the idea: shorter trekking days to acclimatize and clear hydration guidance. Even if you feel fine, you’ll want to drink enough and keep exertion steady. The win here is that by the time you reach the big push, you’re less likely to arrive feeling rattled by altitude.
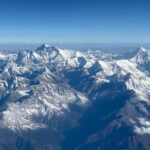

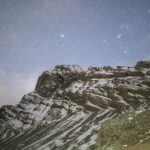

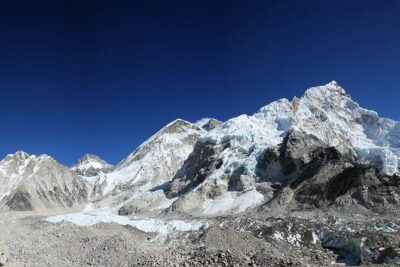
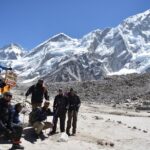
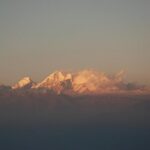
The day that earns the whole trek: Mardi Base Camp at about 4500m
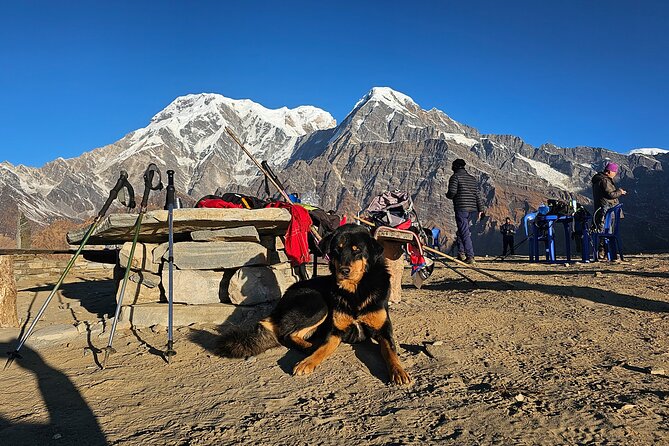
Day six is the showstopper. After breakfast, you trek toward Mardi Himal Base Camp, described as the main exhilarating part of the journey. Along the way, you hit a viewpoint with panoramic vistas of the surrounding peaks—this is the moment when the whole trek starts to feel like it was worth the effort.
In at least one past group’s account, the target is described as Mardi Base Camp at about 4500m. That fits what most hikers are chasing: a high point where the Annapurna massif views look close enough to touch, and the mountains feel less like a distant idea.
If you’re the kind of person who needs a mental goal, set one for this day: control your speed, take breaks without rushing, and aim to arrive with enough energy to enjoy the moment. The summit-feel here isn’t about sprinting. It’s about arriving calm enough to soak it in, even if the air is thin.
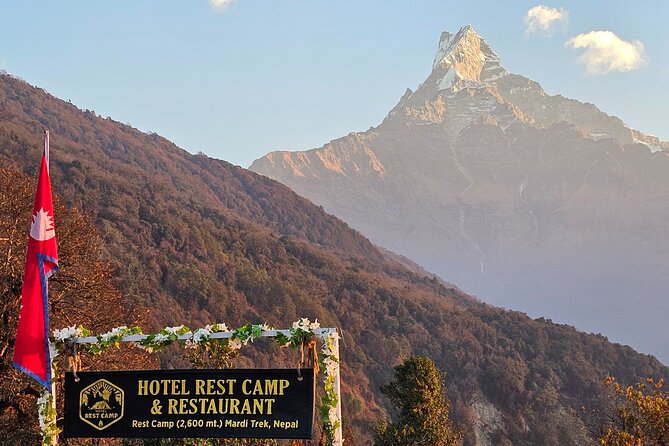
And yes, you might find food options at higher camps. One shared favorite is pizza at High Camp—not because it’s required, but because it’s a fun morale boost when you’re tired and cold.
Sidding: rhododendron and pine on the descent, with alpine breakfast
Day seven shifts to descending, starting from a higher spot after an alpine breakfast. You’ll walk toward Sidding for about 6 hours, and the route goes through rhododendron and pine trees.
Descent days can feel tricky. They’re often shorter in time than the hard climbs, but your knees do the talking. The nice part about this trip is that the team has experience adjusting the route when hikers need gentler pacing—so if you start to feel strain, you should speak up early rather than trying to “tough it out.”
There’s also mention of eating at Low Camp depending on timing, which tells me the day is managed around practical breaks, not just the shortest line on a map. That matters for comfort, especially if you’re trying to keep sleep decent for the next day.
Lwong day and the tea-garden morning in Pokhara
Day eight is often described as a highlight because it features mostly flat terrain and passes through a picturesque village area. Your first stop is Lwong, where you’ll see ancestral houses and get a calmer pace than the mountain scramble days.
This is where you reset. The trek becomes a travel day again—still active, but less punishing. When you’re moving out of high-altitude intensity, village time helps you feel human again. It’s also the kind of day where you can enjoy details: doorways, trail conversations, and the slow shift from trekking logistics back to normal life.
Day nine then brings you back to Pokhara. You rise early to walk through tea gardens around Lwong, enjoying sunrise light. It’s a gentle payoff after the hiking days, and it’s a nice contrast to the cold, thin-air work you did to get up high.
Pokhara sightseeing day: Davis Waterfall and Gupteswor Mahadev
Day ten keeps the travel tone: breakfast, then guided sightseeing in Pokhara. The listed stops include Davis Waterfall and Gupteswor Mahadev.
This day is useful for one reason: it gives your body something besides stairs and rocks. Even a short guided route helps you feel like you got more than “just a trek.” And because this is scheduled after the hardest elevation work, it’s a recovery-friendly way to see more of Nepal’s lakeside region.
You’ll also notice a practical balance here: the trek has lodge meals covered, but meals in Pokhara beyond what’s listed aren’t included. Plan for that so you’re not surprised by restaurant bills.
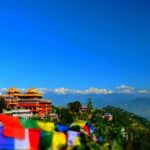
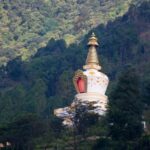
Back to Kathmandu: a final guided look at the city
On day eleven, you return to Kathmandu and explore with a town guide. The plan is fairly flexible: immerse yourself in city culture and heritage through guided destinations, with time to reflect on what you climbed.
I like finishing this way. After a trek that deals with weather, altitude, and long hiking hours, having an organized guide in a city makes the ending smoother. You can keep your energy for street life and viewpoints instead of spending it on transit mistakes.
Price and logistics: what you’re really paying for
At $1,058 per person for an 11-day program, this price sits in the “serious trekking with support” range. The value is in what’s included:
- Permits: ACAP and TIMS are covered.
- Flights: Kathmandu to Pokhara and back by domestic flight for you and the guide.
- Transfers: private vehicle airport and city transfers are included.
- Guide and porter: a government-licensed guide is included with meals, accommodation, and insurance; you also get a porter with meals, accommodation, salary, and insurance.
- On-trail lodging: twin-sharing lodges are provided at “best available” options.
- Meals: breakfast on 10 mornings, lunch on 8 days, dinner on 8 days.
- Gear on request: a down jacket, sleeping bag, and duffel bag are provided and returned after the trek.
That’s a lot of coordination. If you were doing this independently, you’d likely spend time and money piecing together permits, guide contracts, flight timing, porter arrangements, and the lodge plan day by day.
What’s not included also matters:
- International airfare and Nepal visa fees
- Travel/rescue insurance
- Drinks, WiFi, and hot showers (common “nice-to-have” extras)
- Tips for staff and personal expenses
- Meals in Kathmandu and Pokhara except where specified
So, if you want a trek where the big moving parts are already handled, this is strong value. If you’d rather manage permits, guides, and meals yourself to keep costs lower, you might find a cheaper independent route—but you’ll spend more energy handling the details.
What to pack for cold nights and lodge living
Even with a provided sleeping bag and down jacket, plan for real mountain cold. One practical piece of advice that shows up clearly from past hikers: bring enough warm layers for the cold, even if you can buy small items along the way.
Here’s what to focus on:
- Layers you can adjust (morning chill, midday sun, evening wind)
- A plan for gloves and a warm hat (common comfort gap at higher camps)
- Good trekking shoes you already trust
- A day bag that works when you’re moving between High Camp, Low Camp, and viewpoint breaks
Also remember: lodge life is simple. Hot shower and WiFi aren’t included. That’s fine if you manage expectations and treat the mountains as the main event.
And since this is twin-sharing lodge accommodation, you’ll want to keep your space tidy and protect your essentials from moisture.
Who should choose this Mardi Himal Trek (and who might not)
This trek fits best if you want:
- a Himalayan experience with a trail that’s generally suited for beginners
- support that handles permits, lodging, meals, and logistics
- a strong view payoff at Mardi Base Camp
- acclimatization pacing built into the schedule
It also suits people with moderate physical fitness and a willingness to hike several hours per day. You’re not doing couch-to-summit, but you’re also not committing to a hardcore technical trek based on what the plan describes.
You might consider another option if:
- your doctor has strongly limited you from altitude exposure
- you hate long days on foot and tend to get stressed by cold nights
If you’re unsure, ask your provider what pace they expect for your group, because the best trekking experiences happen when you’re honest early about your comfort level.
Should you book this Mardi Himal Trek?
I’d book this if you want a first-timer-friendly Annapurna-region trek with a real high point, guided support, and fewer moving parts to manage yourself. The combination of Mardi Base Camp views, altitude-aware pacing above 3000m, and a guide/porter team that keeps the plan running smoothly makes it a strong all-in-one option.
Skip it if you’re looking for the absolute cheapest route or if you want total DIY control. For most people aiming for a memorable Himalayas trek without turning the trip into logistics work, this one is a solid choice.
FAQ
How long is the Mardi Himal Trek?
It runs for about 11 days.
Where does the trek start and end?
It starts and ends back at the Mission Himalaya Treks and Expeditions meeting point in Thamel, Kathmandu.
Is Kathmandu included, or is it just the hiking part?
Kathmandu is included. You’ll spend time in Kathmandu before the trek starts and again on the final day, with guided city exploring.
What permits are included for the trek?
The tour includes the required permits: ACAP and TIMS.
Are domestic flights included?
Yes. Kathmandu to Pokhara and back domestic flight tickets are included, and they also include tickets for the guide.
Do you get trekking gear like jackets or sleeping bags?
Yes. On request, you can get a down jacket, sleeping bag, and duffel bag, and they’re returned after the trek.