REVIEW · MARDI HIMAL & PEAK CLIMBING
Island Peak Climbing | Summit 6,189m with Expert Guides
Book on GetYourGuide →Operated by Accessible Adventure Pvt. Ltd · Bookable on GetYourGuide
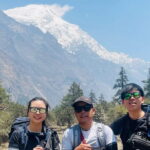
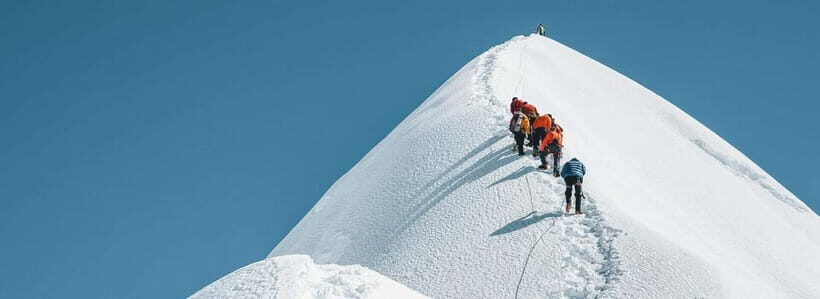
Island Peak at 6,189m is not a casual trek. This 14-day route in Nepal’s Everest region mixes big Himalayan views with practical mountaineering prep, guided by Island Peak specialists. You also get Sherpa culture in real mountain villages, not just roadside stops.
I really like how the plan builds you up for the climb. You’ll spend time acclimatizing in places like Namche Bazaar and Chukkung, then get hands-on glacier walking training at base camp before summit day. I also like the people side: a licensed English-speaking guide, plus a porter system (one porter for every two clients), which keeps the focus on moving safely at altitude.
One possible drawback to plan for: you’ll still pay extra for the Island Peak climbing permit and the round-trip flight to Lukla. Add variable mountain weather and the fact that you’re going high, and this trip is only a great fit if you’re comfortable budgeting for extras and taking altitude seriously.
In This Review
- Key Things That Make This Island Peak Trip Worth Your Time
- Island Peak to 6,189m: What This Trip Really Delivers
- Getting In: Kathmandu, Transfers, and the Short Turn From City to Mountains
- The Lukla Flight: Why Day 2 Matters (Even When It’s Short)
- Phakding to Namche Bazaar: First Bridges, First Everest Views
- Namche Acclimatization Day: The Difference Between Going High and Staying Safe
- Tengboche to Dingboche: Monastery Atmosphere and Higher Valleys
- Chukkung: Getting Close to Island Peak’s World
- Island Peak Base Camp: Where Training Becomes Real
- Summit Day: Day 9 to 6,189m and Back
- Contingency Day on Day 10: The Smart Insurance for Weather
- Trek Back Down: Namche and Lukla With Momentum
- The People Factor: Guides, Sherpas, and Support That You Can Feel
- Gear, Training, and What You Still Need to Bring
- Permits, Extra Costs, and the Budget Reality
- Who This Island Peak Climb Suits Best
- Should You Book This Island Peak Trip?
- FAQ
- How long is the Island Peak climbing program?
- What is the summit height for Island Peak?
- What’s included in the price?
- What costs are not included?
- Do I need travel insurance?
- What gear should I bring?
Key Things That Make This Island Peak Trip Worth Your Time
- Summit goal at 6,189m with a dedicated ascent guide and summit-day focus.
- Real acclimatization pacing through Namche, Tengboche, Dingboche, and Chukkung before base camp.
- Pre-climb instruction at base camp, including glacier walking practice and core gear use.
- Support structure that’s easy to understand: porter support, group climbing equipment, and 24-hour company backup.
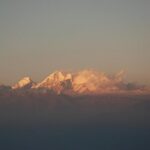
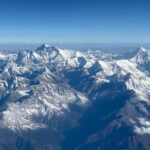
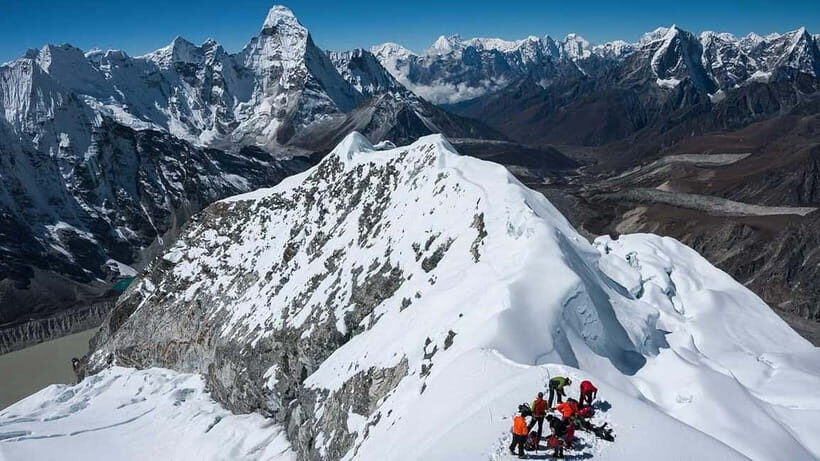
- Everest-region showstoppers on the route, including views of Everest, Lhotse, Ama Dablam, plus Island Peak itself.
- A contingency day for weather and summit timing on Day 10.
Island Peak to 6,189m: What This Trip Really Delivers

Island Peak, also known as Imja Tse, sits in the Everest region and is famous because it’s a step up from trekking into true alpine climbing. This itinerary leans into that idea. It doesn’t just throw you onto rock-and-ice and hope for the best. Instead, you get days of trekking, altitude adaptation, and training that make summit day feel like the end of a process, not a surprise.
From a value standpoint, this is a fairly “complete” package for the climbing portion. You’re getting group equipment (ropes, ice screws, snow bars, ice hammers, tents, and kitchen gear), trained climbing support, and the big permit-and-fee items tied to protected areas and the local municipality. The parts that aren’t included—Lukla flights and the Island Peak permit—are common add-ons in Nepal. The key is knowing they exist before you budget.
If your dream is to stand on a Himalayan summit and you want the climb handled with structure, this setup makes sense. If you’re looking for a relaxed sightseeing stroll, you may find the height and training demands less forgiving.
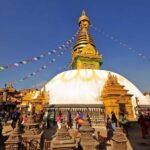
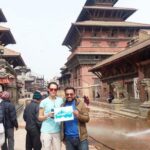
You can also read our reviews of more tours and experiences in Kathmandu.

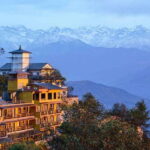
Getting In: Kathmandu, Transfers, and the Short Turn From City to Mountains
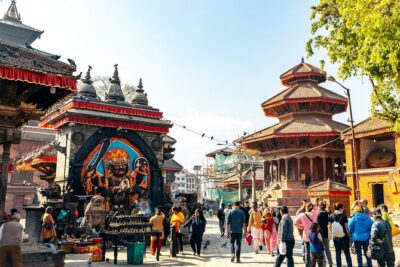
Your trip starts in Kathmandu, with airport and hotel transfers handled by private vehicle as per the itinerary. You’ll also have two nights in a deluxe Kathmandu suite-type home (or similar). That matters more than it sounds. Before a mountain push, you want sleep that’s clean and predictable, plus time to organize your gear.
Kathmandu is also where jet lag meets planning fatigue. This route gives you a buffer day before trekking begins, and that helps you sort out essentials like cash, passport checks, and any personal climbing-gear needs. Drones aren’t allowed, so if you’re thinking about bringing one for quick footage, you’ll want to leave it at home.
The practical takeaway: use Kathmandu to get ready, not to cram last-minute shopping. Your trek days will be about motion, and the climb days will be about focus.
The Lukla Flight: Why Day 2 Matters (Even When It’s Short)
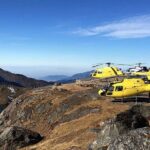
Day 2 involves the scenic flight to Lukla, then trekking onward to Phakding. The flight is only about 35 minutes, but it’s a major altitude and mindset shift. You go from city air into the Everest region’s “real life” mountain transport system fast.
The timing is also important: this trip notes that peak season flights to Lukla may operate from Ramechhap Airport instead. That’s a useful heads-up because it can change your departure schedule and how early you need to be ready. The good news is that you’re not doing this solo—there’s 24-hour support from the company, and the overall itinerary includes transfers.
After the flight, you’ll trek around 3–4 hours to Phakding (about 8 km, with a descent). That’s a gentle start that helps you shake out your legs before you head toward the bigger altitude gains.
Phakding to Namche Bazaar: First Bridges, First Everest Views
Day 3 is where the Everest region starts to feel real. You’ll trek to Namche Bazaar (5–6 hours, about 10 km) and cross suspension bridges—always a moment that reminds you you’re not in a paved-world hike anymore.
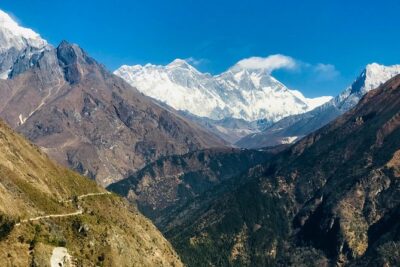
You’ll also get your first sighting moments. This itinerary explicitly includes Thamserku and Everest along the way. That kind of early visibility does two things: it confirms you’re in the right place, and it gives you a mental landmark for what you’ll chase later.
Expect elevation gain during this day (about +600m, topping out at 3,438m). That’s why the next day’s acclimatization is non-negotiable.
Namche Acclimatization Day: The Difference Between Going High and Staying Safe
Day 4 is a dedicated acclimatization day in Namche Bazaar (2–3 hours, optional hikes). You’ll stay at roughly 3,438m and can do short hikes to help your body adjust, rather than pushing higher every day like an eager rookie.
This is also where you’ll likely see Everest and Ama Dablam from nearby vantage points. Even if clouds roll in, the point of this day isn’t only photos. It’s giving your body a chance to adapt before the climb becomes more serious.
One practical note: acclimatization days can feel “wasted” if you’re excited to climb. They’re not. They’re what make the higher days manageable.

Tengboche to Dingboche: Monastery Atmosphere and Higher Valleys
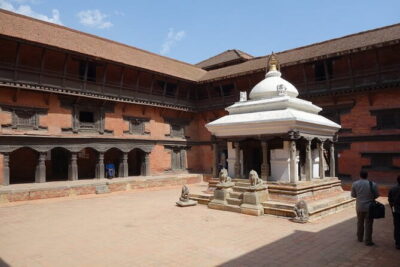
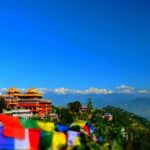
Day 5 takes you to Tengboche (about 5–6 hours, 9 km). The standout here is the Tengboche Monastery, a cultural stop that gives context to the religion and mountain life of the Khumbu region. You’ll also keep seeing Everest, Lhotse, and Ama Dablam on the horizon.
After that, Day 6 moves you to Dingboche (5–6 hours, 10 km, elevation up to about 4,360m). The itinerary calls out picturesque valleys and views of Lhotse and Ama Dablam. This is also the point where the air tends to feel thinner and every “extra” effort costs more energy.
The drawback to watch for: as you climb, it’s easy to speed up because you’re motivated. Don’t. Keep your pace controlled. That’s how you avoid turning a summit attempt into a survival march.
Chukkung: Getting Close to Island Peak’s World
Day 7 is a shorter trekking day to Chukkung (3–4 hours, about 6 km) and elevation up to 4,730m. You’re moving through alpine pastures, and the itinerary specifically notes views of Lhotse and Island Peak.
This is a smart staging point. You’re close enough to feel the climb in the air, but still far enough to keep practicing altitude adjustment. It also helps you mentally shift from “trek” to “climb,” especially when you start seeing more mountaineering activity around you.
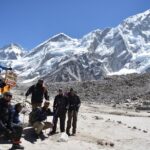
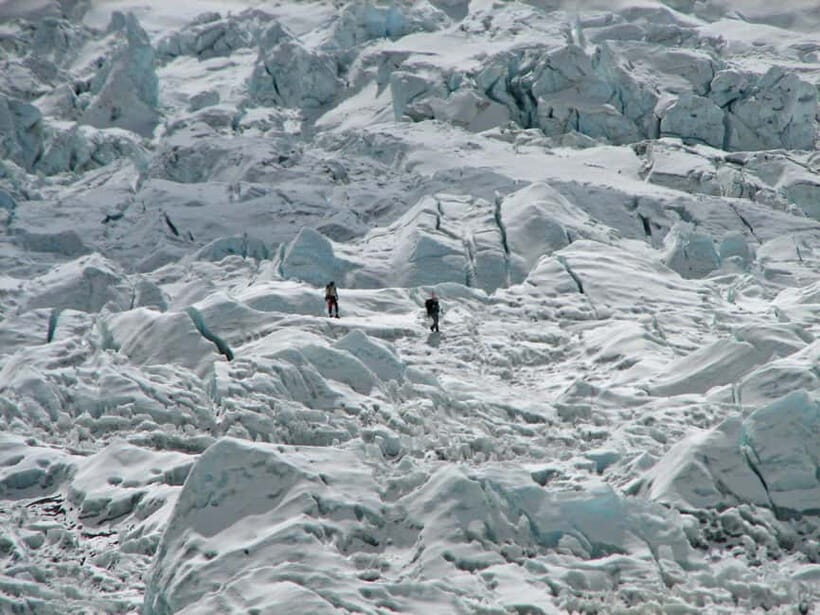
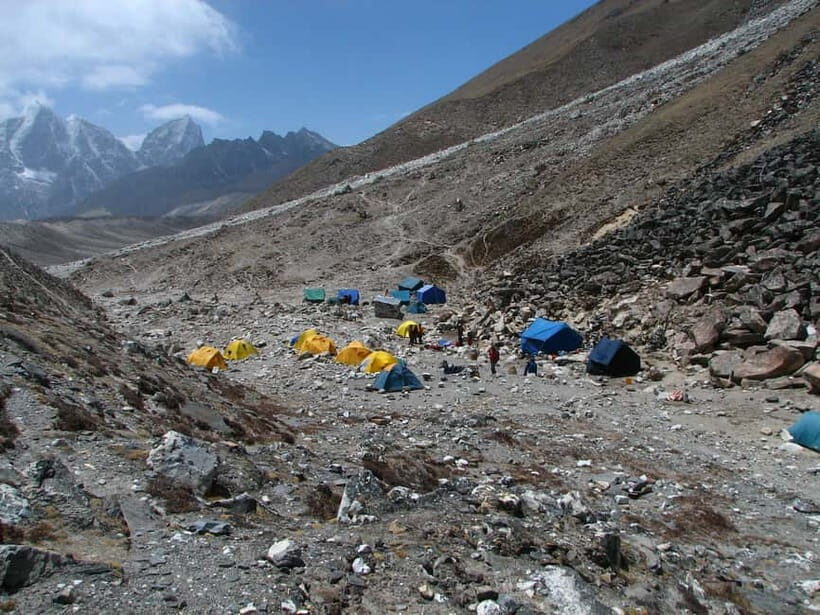
Island Peak Base Camp: Where Training Becomes Real
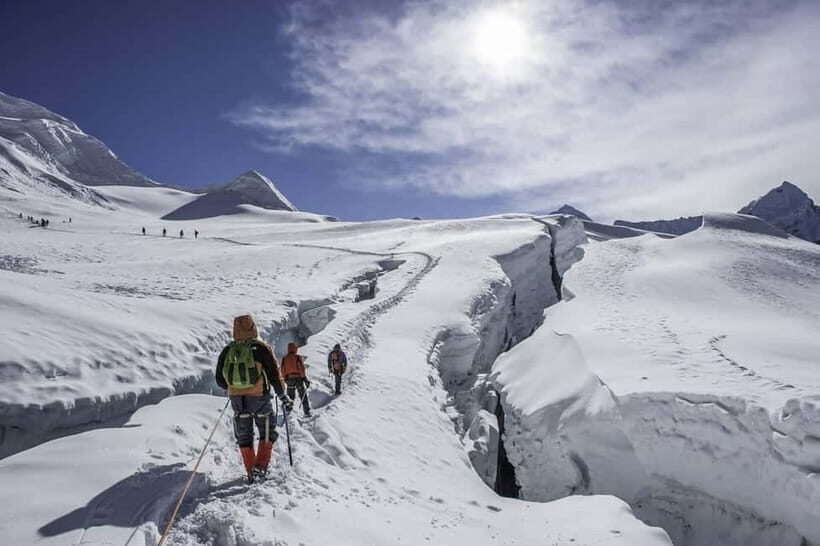
Day 8 is one of the most important days on the calendar. You trek to Island Peak Base Camp (about 3–4 hours, roughly 5 km, altitude up to about 5,200m). Then comes pre-climb training.
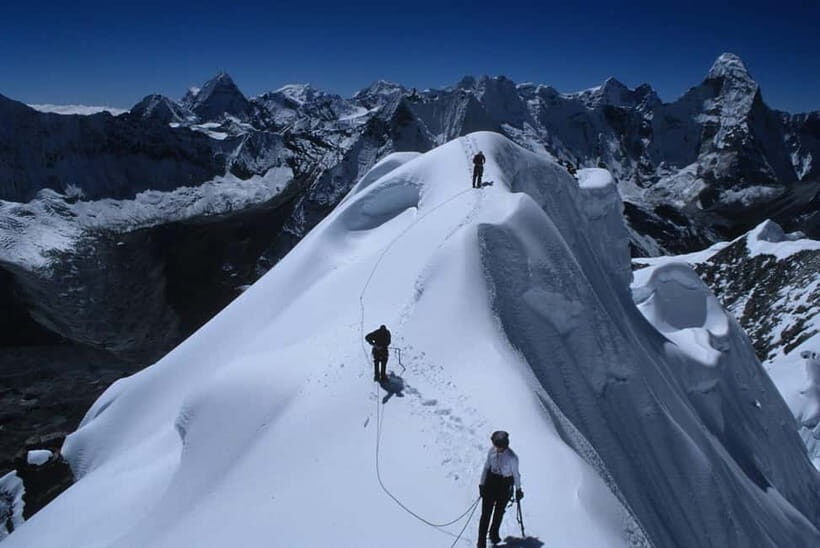
This itinerary includes glacier walking training—exactly what you want before you’re moving onto snow and ice with exposure. In plain terms, you’re learning how to place your feet, how to handle the feeling of glacier terrain, and how the group gear works in practice.
You’ll also see Island Peak and Lhotse in this zone. Even if the weather isn’t perfect, base camp training helps you understand what summit day will demand: steady movement, safe tool handling, and staying calm when conditions feel colder and steeper.
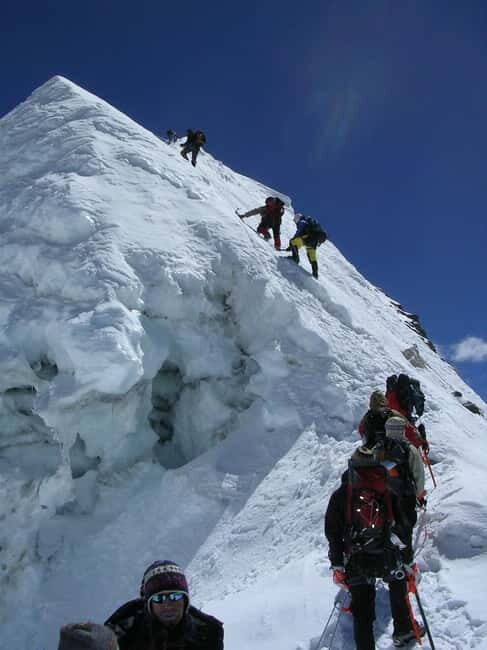
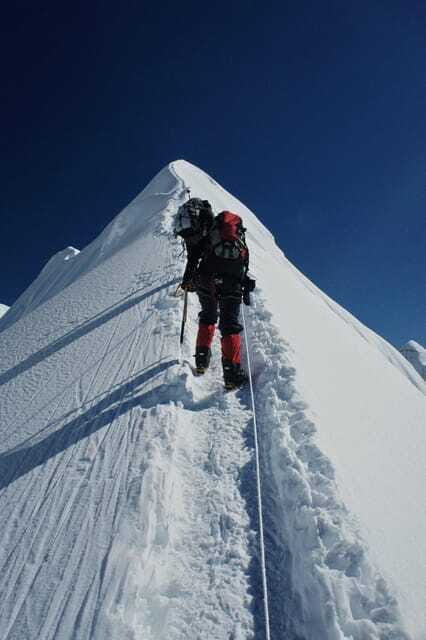
Summit Day: Day 9 to 6,189m and Back
Day 9 is the big one: summit Island Peak (6,189m), then return to base camp for a long day of about 8–10 hours. This is also when the itinerary shows the biggest net elevation change (+989m / -989m). That means you’ll be working against altitude fatigue as well as cold and effort.
The plan indicates distances around 10 km for the day. Don’t focus on the number too much. On summit day, time and energy management matter more than step-count stats.
This is also where you’ll be happy you didn’t rush earlier days. If your acclimatization went well and your pacing stays controlled, summit day feels like a climb you’ve trained for, not a random test.
Contingency Day on Day 10: The Smart Insurance for Weather
Day 10 is a contingency day. That’s not just bureaucratic padding; it’s real mountain logic. Weather can slow or block summit attempts, and having a buffer makes the rest of the itinerary work better.
If conditions change, you get time to adjust rather than sacrificing safety or forcing an ill-timed push.
Trek Back Down: Namche and Lukla With Momentum
Day 11 takes you back from Chhukung to Namche Bazaar (5–6 hours, long descent distance about 18 km) with elevation dropping to about 3,438m. This day matters because it shifts your body from “high and tight” to “move and manage descent fatigue.”
Then Day 12 continues the trek to Lukla (about 6–7 hours, 19 km, down to around 2,800m). This is the final big walking day. After summit work, your legs will need steady pacing on the downhill.
Day 13 flies back to Kathmandu (about 35 minutes). A final day in Kathmandu gives you space to breathe and recover from the mountains’ intensity before departure on Day 14.
The People Factor: Guides, Sherpas, and Support That You Can Feel
Here’s one of the strongest reasons to trust this organizer. The reviews emphasize organization and safety, with Sherpas and porters described as friendly, professional, and focused on making sure everyone stays safe.
There’s also a specific detail worth noting: one review praises a climbing guide who also acts as a route guide, with extensive experience climbing demanding peaks like Ama Dablam, plus good technical training. That kind of dual-role experience can help on summit day, when the climb needs both practical technique and route awareness.
Porter support also gets real credit in the feedback. One reviewer singled out a porter named Mijan for going beyond typical duties. Even if your own porter relationship will be different, it’s a good indicator that human support is treated seriously here, not as an afterthought.
From your point of view, that matters. If something feels off at altitude, you want calm, competent decision-making around you.
Gear, Training, and What You Still Need to Bring
You don’t arrive empty-handed. Group climbing equipment is included, and you also get a duffle bag. You’ll have training at base camp and the itinerary includes tents and kitchen equipment for the climbing portion.
What you still must handle personally: the essentials like passport, climbing gear, cash, and a flashlight. The listing also states you should bring trekking gear, though key items like a duffle bag, sleeping bag, and down jacket are provided.
A practical checklist approach works best: pack climbing basics you’re comfortable using, keep them dry, and don’t rely on borrowed gear that you don’t know. If you’re missing anything, ask early so you’re not scrambling in Kathmandu.
Permits, Extra Costs, and the Budget Reality
This trip price is listed at $1,699 per person, and it includes major fees like Sagarmatha National Park entry and the NMA service charge / royalty fee, plus SPCC garbage-related coverage and other park and local municipality fees. It also includes the required government-licensed guidance structure and a porter-per-two-clients system.
What’s not included: Island Peak climbing permit (listed as USD 350 or USD 175), round-trip flights Kathmandu to Lukla (listed as USD 440 per person), and travel insurance for the climbing guide (USD 100). Tips for guides, porters, and drivers are customary but not included.
So the real value question isn’t just the base price. It’s how much of the “messy parts” are already covered. Here, the route is heavily supported: logistics, meals, lodging style changes (lodges plus tented accommodation), and climbing gear are all built in. You just need to budget for Lukla flights and the summit permit, plus your own personal expenses like Wi-Fi or drinks.
Who This Island Peak Climb Suits Best
This is best for people who want a serious altitude climb with training, not just a dramatic trek. You should have a good level of fitness for high-altitude climbing, and you must arrange travel insurance that explicitly covers high-altitude trekking and climbing.
It’s not suitable for children under 14, pregnant women, wheelchair users, and people over 95 (based on the provided limits). If you’re managing any health concerns, check with a clinician before you go—altitude and cold are demanding and not something to wing.
Should You Book This Island Peak Trip?
I’d book this if you want a well-structured route that’s built around acclimatization, includes real pre-climb glacier practice, and comes with a guide setup that emphasizes safety and technical support. The reviews reinforce that the organization is tight and that Sherpas and porters are both professional and kind, which is exactly what you want at altitude.
I’d hesitate if your budget can’t flex for extra items like the Lukla flights and the Island Peak climbing permit. I’d also think twice if you’re chasing only scenery and don’t want to commit to the physical and technical demands of a summit climb.
If you’re a motivated, fitness-ready climber who wants the Everest region experience with hands-on training and strong logistics, this package fits the goal.
FAQ
How long is the Island Peak climbing program?
The program runs for 14 days, including arrival in Kathmandu, the trek through the Everest region, the summit day, and the return to Kathmandu.
What is the summit height for Island Peak?
Island Peak is listed at 6,189 meters, and the itinerary includes a summit attempt on Day 9.
What’s included in the price?
The package includes airport and hotel transfers by private vehicle (as per itinerary), two nights in Kathmandu, three meals per day during the trek, group climbing equipment, a climbing guide for the Island Peak ascent, park and related fees, porter support (one porter for every two clients), lodging during the trek (local lodges and tented accommodation), base camp acclimatization and pre-climb training, and 24-hour support.
What costs are not included?
Not included are the Island Peak climbing permit, round-trip flights Kathmandu to Lukla, travel insurance for the climbing guide, personal expenses (like Wi-Fi, drinks, and laundry), and alcohol or other personal items. Tips are customary but not included.
Do I need travel insurance?
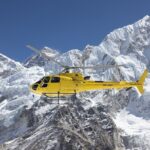
Yes. The provided guidance says you should ensure your travel insurance covers high-altitude trekking and climbing, since there is also a heli rescue assistant to contact your insurance.
What gear should I bring?
You should bring your passport, climbing gear, cash, and a flashlight. Essential items like a duffle bag, sleeping bag, and down jacket are provided, and you’ll also be asked to bring personal trekking gear.