REVIEW · EVEREST BASE CAMP TREKS
Everest Base Camp with Gokyo Lake 17 Days
Book on Viator →Operated by Sunrise Adventure Trek P. Ltd · Bookable on Viator
Everest Base Camp and Gokyo Lakes is a combo that feels like two trips in one. You get the big Everest milestones, plus the quieter high-altitude beauty of Gokyo, all while working through acclimatization the smart way in Sagarmatha National Park. With a small group cap of 18 travelers, guided pacing, and meals handled on the trail, this trek is built for people who want the experience without getting lost in logistics.
What I like most is the way the schedule balances effort and recovery, especially the day built into Namche Bazaar and the long high-pass days like Cho La Pass. I also like that support is real on the ground: guides and porter teams, trekking lodges along the way, and even the extras that make life easier at altitude like a T-shirt, certificate, and (if you need it) sleeping bag and down-jacket options.
One consideration: this is still a serious high-altitude trek with steep climbs and long days. If you’re not used to walking on rugged trails with thin air, you may feel it more than you expect, even with careful pacing and acclimatization.
In This Review
- Key things that make this Everest + Gokyo trek worth your attention
- Kathmandu start: setting yourself up for mountain time
- The Lukla flight and the first trail day (Phakding): where the trek really starts
- Namche Bazaar acclimatization day: the single best investment on the route
- Dole and Machhermo: learning your pace before the high push
- Gokyo arrival and Gokyo Ri: the view moment built into the schedule
- Cho La Pass to Dzonglha: the day you plan for, not rush through
- Lobuche and Gorak Shep: getting close to the Everest zone
- Everest Base Camp or Kala Patthar: choose your style of morning
- Tengboche and Monjo: the monastery moment and the relief of lower altitude
- Lukla back to Kathmandu: finishing strong without overcomplicating things
- Support you actually feel: guide, porter ratio, and meals that keep you moving
- Price and value: what $1,480 buys you (and what it doesn’t)
- Who this trek fits best (and who might want a different plan)
- Should you book this Everest Base Camp with Gokyo Lakes trek?
- FAQ
- How long is the Everest Base Camp with Gokyo Lake trek?
- What’s included in the trek meals?
- Do I need to bring my own sleeping bag or down jacket?
- What permits or cards are included?
- Are international flights and travel insurance included?
- How large is the group?
Key things that make this Everest + Gokyo trek worth your attention
- Small group size (up to 18), which helps the trail feel less crowded without making it feel empty.
- Two major viewpoints on the same overall adventure: Everest Base Camp or Kala Patthar, plus Gokyo Ri.
- Cho La Pass day is the heart-pumper of the route, linking Gokyo toward Lobuche.
- Guides like Pemba and Pasang are named in real feedback, with friendly, helpful service.
- Lodges and full trekking meals are handled, so you can focus on walking and resting.
- Tengboche monastery stop plus a cultural show and farewell dinner add more meaning than just mountain photos.
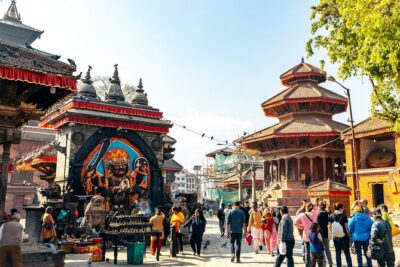
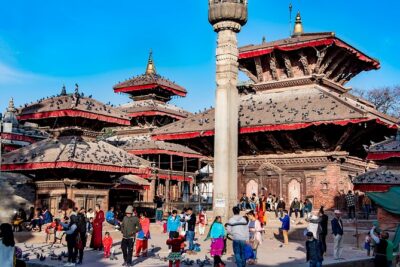
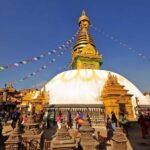
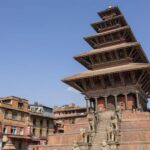
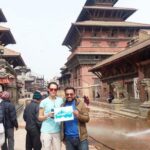
Kathmandu start: setting yourself up for mountain time
Your trek begins in Kathmandu, where you transfer to a three-star hotel in twin sharing rooms with breakfast. I like this part because it gives you a normal night before the jump into small airports, early flights, and rougher schedules. It also means you can handle basics like buying a few last items, double-checking your layers, and getting a good meal in before you start calorie budgeting for altitude.
You’ll also get the sense that this trip is built around support, not guesswork. Airport pickup and departure are included, and you’re set up to move from city logistics into the trekking rhythm without feeling dropped in. If you’re the type who hates improvising, that matters.
You can also read our reviews of more tours and experiences in Kathmandu.

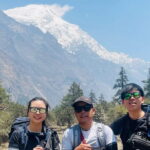
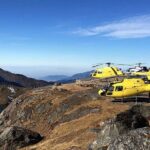
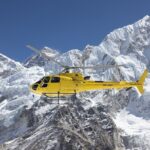
The Lukla flight and the first trail day (Phakding): where the trek really starts
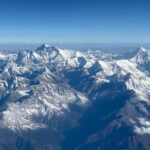
The next step is the flight from Kathmandu to Lukla, followed by the trek to Phakding around 2,620m (8,594ft). This is a classic jump-in point on Everest routes, and it changes your mood fast. Suddenly you’re in the valley world of the Khumbu region, where prayer flags and village paths start appearing in every direction.
Trekking to Phakding gives you a gentle ramp into the routine: steady walking, lodge stops, and eating on schedule. You’re moving, but you’re not yet in the days where every breath feels like work. It’s also where you learn how your body handles the walking pace while carrying what you truly need (and not what you packed out of anxiety).
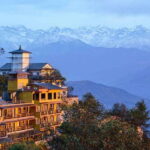
Namche Bazaar acclimatization day: the single best investment on the route
You trek to Namche Bazaar around 3,420m (11,218ft), then you get a rest and exploration day. For this style of trek, that buffer is everything. It helps your body adjust before you start gaining height more aggressively.
Namche is not just a checkpoint. It’s a hub with viewpoints, bakeries, shops, and plenty of lodge life that lets you recover without feeling like you’re stuck. The real value is that this is where you practice staying calm: don’t sprint uphill, hydrate, and keep your layers right. If you’ve ever felt altitude hit you when you pushed too hard too soon, this day is the antidote.
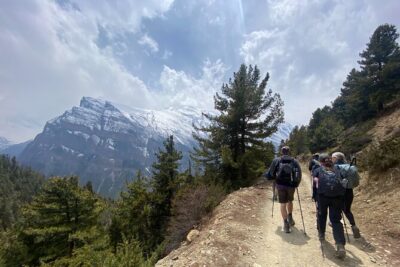
Dole and Machhermo: learning your pace before the high push
After Namche, you move on to Dole (around 4,110m / 13,481ft) and then Machhermo (about 4,410m / 14,465ft). These are days where the trekking feels longer than it looks on paper, because you’re higher and your body starts asking for slower effort.
The route timing matters. You’ll walk about six hours to Dole, then roughly three to five hours to Machhermo. That pattern is helpful because it avoids the common mistake of stacking huge days back-to-back before you’re fully acclimatized for the higher elevations.
I also like that these stops keep you moving through real villages and lodge networks, not just passing through wilderness. It makes the trek feel connected instead of like a series of pre-set checkpoints.
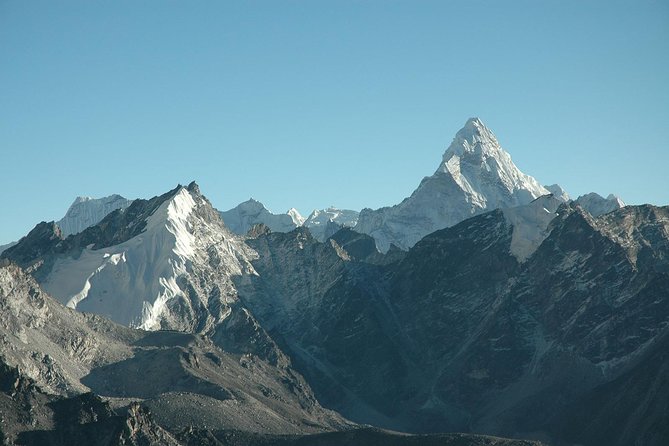
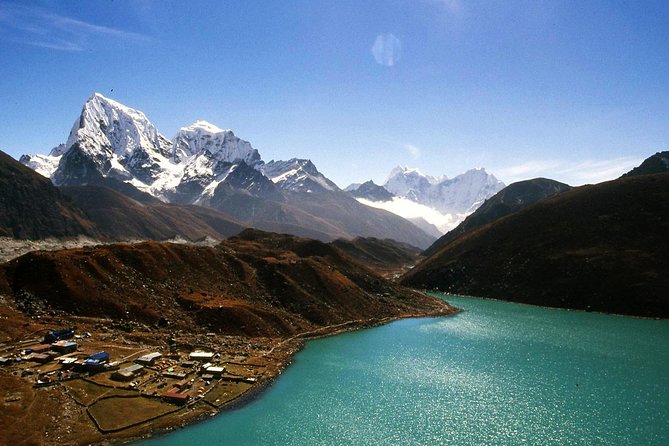
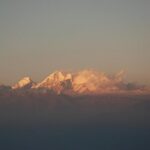
Gokyo arrival and Gokyo Ri: the view moment built into the schedule
You’ll reach Gokyo around 4,760m (15,613ft), then the next day includes a hike to Gokyo Ri before trekking onwards toward Thagnak (about 4,678m / 15,343ft). This is the kind of day that makes the whole Gokyo side feel worth it. You’re not just passing by lakes; you’re earning your viewpoint with a climb that usually pays off in sweeping panorama.
Gokyo Ri is also the kind of hike where altitude teaches discipline. You go slower than you want to, and you start focusing on breath rhythm. If you can manage that, you’ll likely enjoy the day more because you’re not racing the mountain.
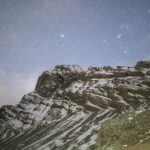

Cho La Pass to Dzonglha: the day you plan for, not rush through
Next comes one of the route’s toughest sections: trekking from the Gokyo side via Cho La Pass, reaching Dzonglha (about 5,420m / 17,778ft). This is where the trek becomes less about steady stroll and more about effort management.
A pass crossing can also bring changing weather and colder conditions, even if earlier days felt comfortable. The practical move is to treat this day like a work shift. Keep your pace even, watch your footing, and don’t burn yourself out early. The reward is reaching a new base altitude for the next stages, with the sense that you’re truly doing the signature crossing rather than just following a simple path.
Lobuche and Gorak Shep: getting close to the Everest zone
From Dzonglha, you trek to Lobuche around 4,940m (16,203ft). Then you reach Gorak Shep around 5,147m (16,882ft). This segment is about positioning yourself near Everest’s high country without rushing the final altitude jump.
Gorak Shep is where you start feeling that familiar Everest-route intensity. It’s not just high—it’s busy with the energy of people who know the next morning is the big one. Lodges here tend to be functional, and your job is to sleep enough, eat steadily, and protect your energy for the morning push.
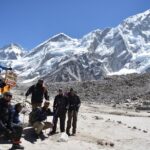
Everest Base Camp or Kala Patthar: choose your style of morning
On the morning hike, you’ll go either to Everest Base Camp (around 5,365m / 17,597ft) or to Kala Patthar (around 5,550m / 18,204ft), then you trek onward to Pheriche around 3,950m (12,956ft). I like this flexibility because it lets you match your choice to how you’re feeling at altitude.
If you want the classic Everest milestone and the sense of being at the edge of the expedition world, Base Camp is the focus. If you want dramatic elevation and strong panoramic viewpoints, Kala Patthar is often the payoff choice—at the cost of more strenuous cold, wind, and breath control.
Either way, you’re rewarded with a big altitude accomplishment, followed by a drop to Pheriche that helps your body recover for the descent days.
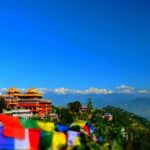
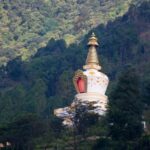
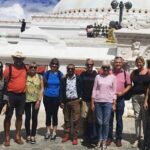
Tengboche and Monjo: the monastery moment and the relief of lower altitude
After returning toward lower elevations, you’ll head to Tengboche around 3,860m (12,661ft), then trek to Monjo around 2,635m (8,61ft). Tengboche is where the experience adds meaning beyond walking: you’re in the region where monastery life is woven into daily culture, and you’ll feel that in the stop itself.
This is also where the trek becomes emotionally easier. The air gets less punishing, and you can start enjoying the village rhythm again. It’s a nice contrast to the high days that felt all-consuming.
Lukla back to Kathmandu: finishing strong without overcomplicating things
You’ll trek back down to Lukla around 2,840m (9,315ft), then fly back to Kathmandu. The last day in the city marks a clean finish: one hotel day is not the focus, but you do get time to reset, shower properly, and process everything you just did.
It’s also worth noting that a farewell dinner and a special cultural show are included. Those add warmth at the end of a route that can feel very serious when the altitude takes over.
Support you actually feel: guide, porter ratio, and meals that keep you moving
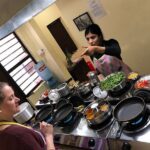
One reason this trip works well for many walkers is how much the basics are handled. You get breakfast, lunch, and dinner on trekking days, with tea or coffee, and you’re not stuck figuring out what’s open or what’s available at each lodge. Food quality varies by altitude and lodge, but having predictable meals is the difference between staying steady and constantly negotiating energy.
Guides and porters are included, and the porter setup is based on a ratio of two guests per Sherpa porter to carry baggage. That can lighten the mental load, especially if you’re traveling with heavier gear or you’re trying to keep your own carry weight reasonable.
Real feedback also gives names to the support. Guides such as Pemba and Pasang are praised for being friendly and helpful, and porter teams come through as supportive on the ground. That matters because at altitude, small practical help can turn into big confidence.
Price and value: what $1,480 buys you (and what it doesn’t)
At about $1,480 per person, this isn’t a budget-only trek, but it also isn’t priced like a luxury mountaineering expedition. You’re paying for the full structure: hotel and lodge accommodation, most ground and trekking logistics, trekking permits and TIMS card support, guide and porter services, and meals through the trek. The inclusion of a T-shirt and achievement certificate is small, but it signals that the operator expects you to go through a managed, supported route.
What you should budget separately is also clear. International flights, travel insurance, tips for the trekking crew, and personal expenses are not included. Extra meals in Kathmandu and any entrance fees you might encounter are also on you. If you need a higher level of comfort or you plan to add extra days or side trips, you’ll want to factor that in.
The best way to judge value: ask yourself if you want to trade some money for reduced decision fatigue. If yes, this price can feel fair. If you prefer total independence, you might find cheaper custom options—but you’ll also do more of the heavy lifting yourself.
Who this trek fits best (and who might want a different plan)
This trek is a strong fit for people with moderate physical fitness who want a guided, structured high-altitude experience. The route includes steep and high sections like Cho La Pass and high mornings like Kala Patthar options, so you should feel comfortable with multi-hour hiking and changing weather.
It also fits well if you like clear pacing and don’t want to manage permits, lodge planning, and guide logistics. The small group size helps, and the full-meal approach keeps you from constantly scanning for food.
If you’re prone to getting hit hard by altitude or you’re newer to hiking at elevation, you’ll want to be extra honest with yourself. A rest day in Namche helps, but this is still a demanding route.
Should you book this Everest Base Camp with Gokyo Lakes trek?
Book it if you want a well-run Everest itinerary with Gokyo Lakes, Cho La Pass, and real support from a guide-and-porter team, plus included meals and lodging. The structure is built for walkers who want to focus on enjoying the trail and managing altitude, not solving logistics.
Don’t book it if you’re chasing a relaxed vacation pace or if you know you struggle with cold, long climbs, and high-altitude exertion. In that case, you may feel better choosing a lower-elevation trek first, then coming back with more stamina.
If you do book, I’d treat the trek like training for a big goal: plan your layers, go slow on acclimatization days, and protect your energy for the high mornings. You’ll be rewarded with the best kind of Everest experience—one that’s demanding, structured, and memorable for more than one view.
FAQ
How long is the Everest Base Camp with Gokyo Lake trek?
The duration is listed as approximately 14 to 19 days, with the experience running through a multi-day route starting from Kathmandu and ending back in Kathmandu after the Lukla flights.
What’s included in the trek meals?
During the trekking portion, breakfast, lunch, and dinner are included as specified in the daily plan, and tea or coffee is also included.
Do I need to bring my own sleeping bag or down jacket?
You can be provided with a sleeping bag and down-jacket during the trek if you need them, according to what’s listed as included.
What permits or cards are included?
The trek includes trekking permit and TIMS card support as part of what’s included.
Are international flights and travel insurance included?
No. International air ticket, travel insurance, and tips for the trekking crew are not included.
How large is the group?
The maximum group size is listed as 18 travelers.